When it comes to how often to change drive belt polaris ranger, getting the right details matters. Hello, fellow off-road adventurers! 🌲 Even if your garage proudly houses a Honda Pioneer, the spirit of UTV exploration unites us all. Today, we’re diving into a crucial maintenance topic that transcends brand loyalties, ensuring every off-road machine, including the popular Polaris Ranger, performs flawlessly on the trails. We’re talking about the lifeblood of your vehicle’s power transfer: the drive belt. Understanding its maintenance is key to uninterrupted adventures! 🛠️
Before we rev up, here are some top product suggestions to keep your Polaris Ranger’s drive belt in prime condition, available on Amazon:
💡 Recommended Products:
Polaris Ranger Drive Belt: Always carry a spare, high-quality replacement belt for emergencies.
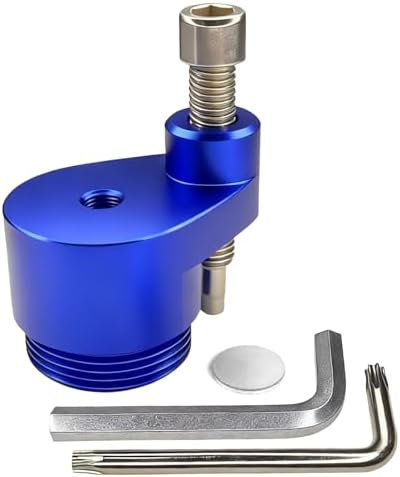
UTV Clutch Spreader Tool: An essential tool for easier belt changes and inspections.
Off-Road Air Compressor: Perfect for cleaning clutch compartments and general trail maintenance.
The Unsung Hero: Why Your Drive Belt Deserves Attention 🦸♂️
The drive belt in your Polaris Ranger’s Continuously Variable Transmission (CVT) is a critical component, silently working to transfer engine power to the wheels. It enables smooth acceleration, provides torque for climbing steep inclines, and ensures your ride is as responsive as it should be. Neglecting this vital part can lead to a host of problems, from loss of power and erratic performance to a complete trail-side breakdown. Trust us, no one wants to be stranded deep in the wilderness! 🚧
Modern UTVs, including the Polaris Ranger, rely heavily on their CVT systems for their robust and versatile performance, making regular belt checks non-negotiable for any serious rider.
How Often to Change Your Drive Belt: The Latest Data for Polaris Ranger 📊
One of the most frequently asked questions among off-road enthusiasts is, “how often to change drive belt polaris ranger?” The answer, like many things in the off-road world, depends on your model year and riding style. Thankfully, Polaris has provided updated guidelines, especially for newer models. 📈
For 2025 and newer Polaris Ranger 1000 and Ranger XP 1000 models, Polaris has significantly extended the service intervals. The core service, which includes a thorough drive belt inspection, is now recommended every 200 hours or 2,000 miles, or yearly, whichever comes first. This is a welcome change, doubling the previous interval of 100 hours or 1,000 miles for earlier models.
Check out our off-road collection Amazon products
This extension means more time enjoying the trails and less time in the shop for routine maintenance, offering massive cost savings over the vehicle’s lifetime.
However, for 2024 and earlier Polaris Ranger models, the traditional guideline of inspecting or replacing the belt every 100 hours or 1,000 miles still applies. It’s crucial to always consult your specific owner’s manual for the most accurate and model-specific recommendations. 📌
https://www.youtube.com/watch?v=F3aJj03zB5Y
The “Severe Use” Factor: When to Shorten Intervals 📉
While the extended intervals for newer models are great, Polaris also emphasizes the “severe use” clause. If your adventures frequently involve:
- Frequent hub-deep mud or sand riding 🌊
- Heavy towing or hauling 🚜
- Long idle periods idling for extended periods
- Constant stop-and-go tasks 🚦
Then you should cut the recommended maintenance intervals in half. This means for 2025+ models under severe use, you’re back to a 100-hour / 1,000-mile inspection and replacement schedule. For older models, this would mean even more frequent checks. This prevents premature wear on your engine, drive belt, clutches, and brakes.
“Your riding environment and style are the ultimate determinants of your belt’s lifespan; listen to your machine, and it will tell you when it needs attention.”
Signs Your Drive Belt Needs Attention 🧐
Beyond the mileage and hour markers, your Polaris Ranger will often give you clear indications that its drive belt is nearing the end of its life. Being vigilant for these signs can save you from a breakdown. 👀
| Sign of Wear | What It Means | Action Required |
|---|---|---|
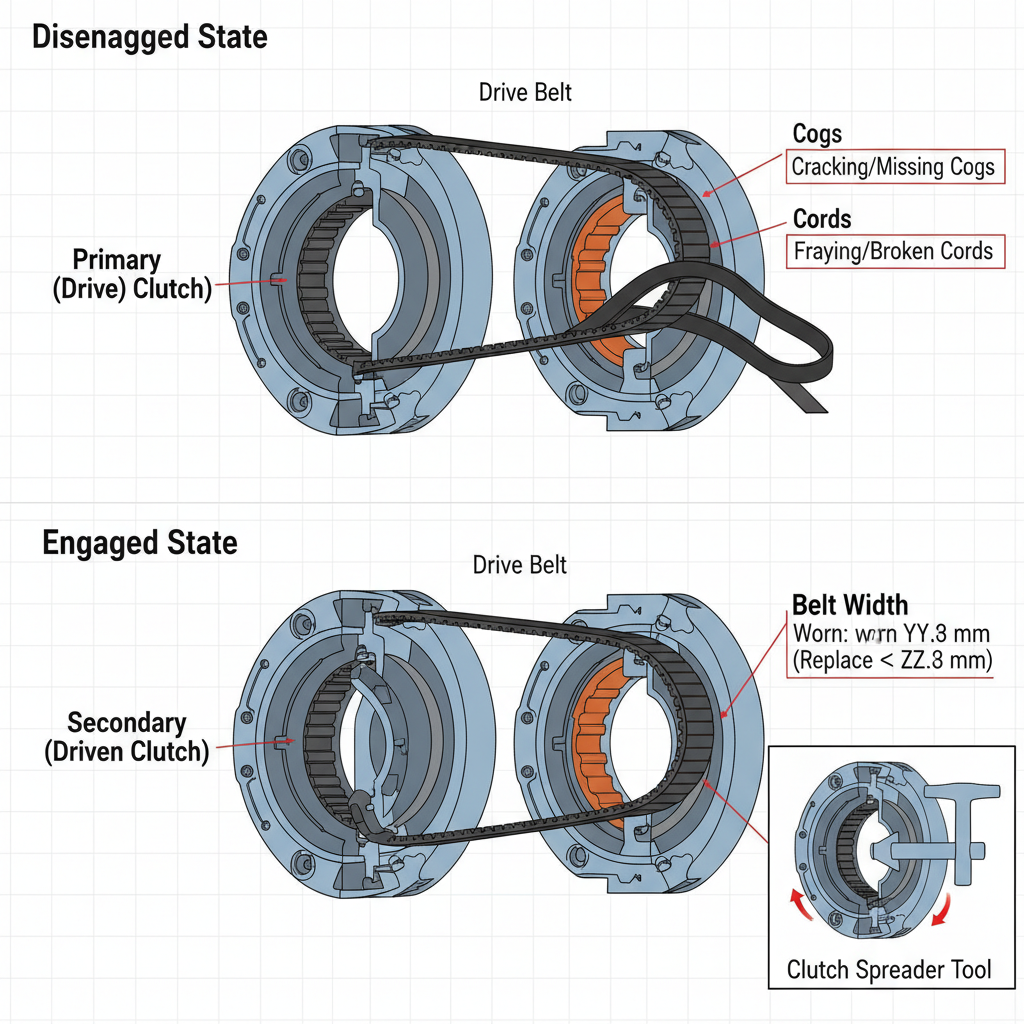
| Visible Cracks, Fraying, or Missing Cogs | Direct physical damage to the belt material or structure. | Immediate replacement. |
| “Hour-Glassing” or Uneven Wear | Belt becoming narrower in certain spots, indicating slipping due to clutch engagement issues. | Replacement, and consider clutch inspection. |
| Burn Marks or Glazing | Indicates excessive heat buildup, often from slipping or clutch issues. | Replace belt and clean dusty clutch vents. |
| Loss of Power or Belt Slipping | The belt isn’t efficiently transferring power, especially during acceleration or inclines. | Inspection and likely replacement. |
| Unusual Noises (Chirping, Squealing) | Could indicate slipping or a damaged belt. | Immediate inspection. |
A proactive visual inspection can catch minor issues before they escalate into major problems, saving you time and money.
https://www.youtube.com/watch?v=R9NcvW8M8zY
Maximizing Your Belt’s Lifespan: Pro Tips from the Trail 🚀
While replacement is inevitable, there are several expert-backed strategies to significantly extend the life of your Polaris Ranger’s drive belt. These tips come straight from experienced riders and mechanics:
- Utilize Low Gear for Heavy Loads: When traveling under 10 mph with heavy cargo or while towing, always engage Low gear. This reduces stress on the belt and clutches, preventing overheating and premature wear.
- Maintain a Clean Clutch Intake Screen: The clutch system relies on proper airflow for cooling. A clogged intake screen restricts air, leading to excessive heat buildup and rapid belt deterioration. Regularly clean this screen.
- Post-Water Crossing Dry-Out: After submerging your clutches in water (like crossing a creek), perform a 30-second dry-out spin at around 3,000 RPM. This expels water and debris, preventing slippage and glaze.
- Inspect and Replace Clutch Components: At around 600 hours, consider disassembling both clutches to inspect and replace worn rollers or bushings. Worn clutch hardware can severely impact belt performance and lifespan.
- Proper Belt Break-in: A new belt needs a proper break-in period. Avoid aggressive throttle, heavy loads, and prolonged high speeds for the first 25-50 miles to allow the belt to seat correctly.
https://www.youtube.com/watch?v=FjIu003Qj2Y
The Drive Belt Replacement Process: A Quick Overview 🔧
Changing a drive belt on a Polaris Ranger is a manageable task for most DIY enthusiasts, especially with the right tools. Here’s a simplified breakdown of the general steps involved:
- Prepare Your Vehicle: Park on level ground, engage the parking brake, and ensure the engine is cool. Safety first! 🛑
- Access the Clutch Cover: Remove the bolts securing the clutch cover. On many Ranger models, this involves working in the wheel well.
- Remove the Old Belt: Use a clutch spreader tool inserted into the driven clutch to open the sheaves. Carefully walk the old belt off both the primary and driven clutches. Note the belt’s direction if you plan to reuse it as reinsertion backward shortens life.
- Inspect and Clean: Thoroughly clean out any dust or debris from the clutch covers and the clutch compartments. Inspect both clutches for any wear or damage.
- Install the New Belt: Loop the new belt over the drive clutch, then the driven clutch, ensuring it’s installed in the correct direction (if applicable). Rotate the drive clutch several times to properly seat the belt.
- Reassemble: Carefully reinstall the clutch cover, ensuring the seal is properly seated, and torque the fasteners to specification.
For a detailed, step-by-step visual guide, you can always refer to excellent resources like the Rocky Mountain ATV/MC YouTube video on changing a Polaris Ranger XP 1000 drive belt.
Check out our off-road collection Amazon products
“A well-maintained belt is the heartbeat of your UTV, ensuring every adventure is powered by reliability and performance.”
Beyond the Belt: Holistic UTV Health 🩺
While this post focuses on the drive belt, remember that it’s just one piece of the puzzle for optimal UTV health. Regular inspections of other components, such as air filters, fluids, and suspension, contribute to the overall longevity and performance of your machine. Whether you’re navigating challenging terrain in a Polaris Ranger or conquering trails in a Honda Pioneer, a comprehensive maintenance routine is your best friend. 🤝
Always keep a service log updated, recording hours, miles, and belt condition after every maintenance session. This not only proves diligent care but also helps predict future maintenance needs and boosts resale value.
Don’t let a worn belt cut your adventure short. Proactive maintenance is the cornerstone of responsible off-roading, guaranteeing that your machine is always ready for whatever the trail throws its way.
Ready for Your Next Adventure? 🗺️
We hope this comprehensive guide has empowered you with the knowledge needed to confidently manage your Polaris Ranger’s drive belt maintenance. Even for our Honda Pioneer loyalists, understanding the nuances of UTV mechanics makes us all better, more prepared off-roaders. Happy trails, and may your belts be strong and your adventures endless! ✨
For more detailed information on Polaris Ranger maintenance schedules, including drive belts, visit the official Polaris Off-Road website: Polaris Ranger Maintenance Resources
Find essential UTV parts and tools for all your maintenance needs: Rocky Mountain ATV/MC
Explore comprehensive UTV maintenance articles and guides: SuperATV Off-Road Atlas
Discover the latest from Honda Powersports, connecting with a community of enthusiasts: Honda Powersports
Stay informed with general UTV care tips and industry news: UTV Driver
🔍 Explore More: See all Wild Testing guides for how often to change drive belt polaris ranger.
Check out our off-road collection Amazon products
- Robust Construction: The Can-am belt removal tool body is crafted from high-strength aluminum alloy, combining excellent…
- Compatible with Can-Am: This tool is specifically designed for various Can-Am side-mounted all-terrain vehicles/multi-pu…
- Replaces Original Parts: This Can-am defender belt removal tool can directly replace original parts (OEM parts: 70820072…

- Vehicle Fitment: This set of four clutch drive belt removal tool is designed for compatibility for Polaris models includ…
- Compact and Portable Design: The clutch drive belt removal tool measures 6.5 x 5 cm (2.6 x 2 in), making it small, light…
- Durable and Reliable Material: Our clutch drive belt removal tool is made from premium carbon steel, with clearly define…
- Wide Compatibility:Clutch drive belt removal tool compatible with Polaris 2016–2019 RZR XP Turbo, RZR-4 XP Turbo, RZR RS…
- Heavy-Duty 42CrMo Steel:Manufactured from 42CrMo alloy steel, offering significantly higher strength and toughness than …
- T-Handle Screw Design (Not L-Type):Upgraded T-handle screw provides better leverage, smoother operation, and more even f…