

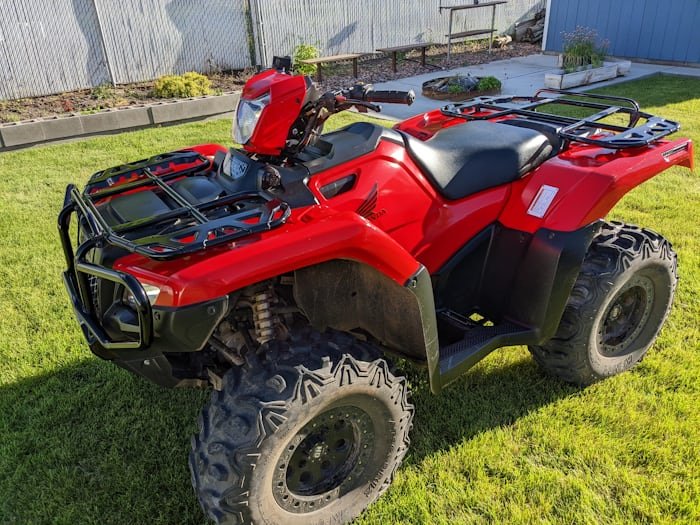
The Honda Pioneer 1000 stands as a paragon in the realm of off-road vehicles, revered for its impeccable engineering and robust performance. 🏍️ Dipstick on a Honda Pioneer 100🏍️
As a flagship model in Honda’s lineup of side-by-sides.
The Pioneer 1000 has garnered widespread acclaim among off-road enthusiasts and professionals alike.
This versatile machine is designed to tackle the most demanding terrains, offering a blend of power, durability, and advanced technology.
Equipped with a potent 999cc twin-cylinder engine.
The Honda Pioneer 1000 delivers an impressive combination of horsepower and torque.
Ensuring that it can handle steep inclines and rugged paths with ease.
Its six-speed Dual Clutch Transmission (DCT) provides seamless shifting and adaptability, whether you’re navigating rocky trails or cruising on open paths.
Additionally, the inclusion of the i-4WD system enhances traction and control, further solidifying its reputation for reliability.
The Honda Pioneer 1000 is not just about raw power; it also boasts a myriad of features designed to enhance user experience and safety.
The spacious cabin offers comfortable seating for up to five passengers, making it ideal for group adventures.
With a versatile cargo bed and a towing capacity of up to 2,000 pounds, it is equally adept at handling work-related tasks.
Advanced suspension systems and adjustable shocks ensure a smooth ride, even when the terrain gets tough.
Moreover, Honda’s commitment to innovation is evident in the Pioneer 1000’s suite of technological enhancements.
From the LCD display that provides vital information at a glance to the inclusion of numerous storage compartments for convenience.
Every detail is meticulously crafted to provide an unparalleled off-road experience.
This attention to detail and performance has cemented the Honda Pioneer 1000’s status as a favorite in the off-road community, known for its reliability and outstanding capabilities.
Regularly checking the oil levels in any vehicle, particularly off-road vehicles like the Honda Pioneer 1000, is of paramount importance for several reasons.
Oil serves as the lifeblood of the engine, ensuring that all the moving parts are adequately lubricated.
In the demanding conditions that off-road vehicles often encounter, such as rugged terrains and extreme temperatures, maintaining proper oil levels becomes even more crucial.
Firstly, adequate oil levels are essential for engine health.
The oil reduces friction between the moving parts of the engine, preventing premature wear and tear.
In off-road environments, where the engine is often subjected to higher stress.
The risk of mechanical failure increases if the oil level is insufficient.
Consequently, regularly checking the oil can help you identify potential issues before they escalate into significant problems, thereby extending the lifespan of your engine.
Secondly, oil plays a vital role in the overall performance of the vehicle. For the Honda Pioneer 1000.
Which is designed to tackle challenging terrains, optimal engine performance is non-negotiable.
Proper oil levels ensure that the engine runs smoothly, delivering the power and efficiency needed for off-road adventures.
An engine running with low or old oil can suffer from reduced performance, which can be particularly detrimental when navigating through tough conditions.
Lastly, maintaining the correct oil levels is key to the longevity of the Honda Pioneer 1000.
Regularly checking and changing the oil can prevent contaminants from accumulating, which can lead to corrosion and other forms of damage over time.
By keeping the oil clean and at the right level, you can significantly prolong the life of your engine, ensuring that your off-road vehicle remains reliable for years to come.
In summary, the importance of checking oil levels in the Honda Pioneer 1000 cannot be overstated.
It is a simple yet effective measure that contributes to engine health, performance, and longevity, making it an indispensable part of vehicle maintenance.
Tools and Preparations Required
Before embarking on the task of locating and checking the oil dipstick on a Honda Pioneer 1000, it is essential to gather the necessary tools and make appropriate preparations.
This ensures a smooth and efficient process while maintaining safety and cleanliness.
Below is a list of items and preparations that will facilitate the task:
Firstly, you will need a pair of gloves.
Gloves are crucial as they protect your hands from oil and grime, providing a better grip when handling components of the vehicle.
A clean rag or cloth is also necessary to wipe off any oil from the dipstick, ensuring an accurate reading of the oil level.
A flashlight can be incredibly helpful, particularly when working in low-light conditions or when trying to locate the dipstick in hard-to-see areas.
The illumination from the flashlight will enable you to find the dipstick more quickly and with less frustration.
It is equally important to consider safety precautions before beginning the task.
Ensure that the Honda Pioneer 1000 is parked on a flat and stable surface to prevent any unintended movement.
Make sure the engine is turned off and has had sufficient time to cool down if it was recently in use.
This precaution helps to avoid burns or other injuries from hot engine components.
Additionally, having a basic understanding of the vehicle’s layout can be beneficial.
Familiarize yourself with the user manual, which often provides diagrams and specific instructions on locating various parts, including the oil dipstick.
This preparation will save time and reduce potential confusion during the task.
Lastly, keep a container or absorbent material nearby to catch any potential spills.
This will help maintain a clean workspace and prevent any environmental contamination.
By assembling the necessary tools and adhering to these preparations and safety measures.
You will be well-equip to locate and check the oil dipstick on your Honda Pioneer 1000 efficiently and safely.
Locating the Engine Compartment
When it comes to maintaining your Honda Pioneer 1000, one of the most crucial steps is locating the engine compartment.
Proper identification of the engine compartment is essential for performing routine maintenance tasks.
Such as checking the oil dipstick, ensuring optimal performance, and extending the lifespan of your vehicle.
The Honda Pioneer 1000 is designed with a user-friendly layout, making it easier for owners to access various components.
To locate the engine compartment, begin by positioning yourself at the rear of the vehicle.
The engine is situated beneath the cargo bed, a strategic placement that not only aids in vehicle balance but also protects the engine from external elements.
To access the engine compartment, you will need to lift the cargo bed.
Start by releasing the latch located on either side of the bed.
Once the latches are disengaged, carefully lift the cargo bed upwards.
It is designed to stay in an elevated position, granting you unobstructed access to the engine compartment.
Note that some models may come equipped with hydraulic lifts to assist in raising the cargo bed.
Making the process smoother and more effortless.
After lifting the cargo bed, you will notice a series of panels and coverings that shield the engine.
These panels are typically secure with screws or clips for add protection.
Using a screwdriver or a similar tool, remove these fasteners and set them aside in a safe place to avoid misplacement.
Once the panels are detach, you will have a clear view of the engine.
Allowing you to proceed with any necessary inspections or maintenance tasks, such as locating the oil dipstick.
Understanding the layout and the steps required to access the engine compartment of your Honda Pioneer 1000 is fundamental for any owner.
This knowledge ensures that you can confidently perform routine checks and maintenance, thereby maintaining the efficiency and reliability of your vehicle.
Identifying the Oil Dipstick
Locating the oil dipstick on a Honda Pioneer 1000 is a crucial step in maintaining the vehicle’s optimal performance.
The oil dipstick is an essential component within the engine compartment, designed to measure the engine oil level.
Identifying it correctly ensures that you can efficiently monitor and maintain the oil levels, thus prolonging the engine’s life.
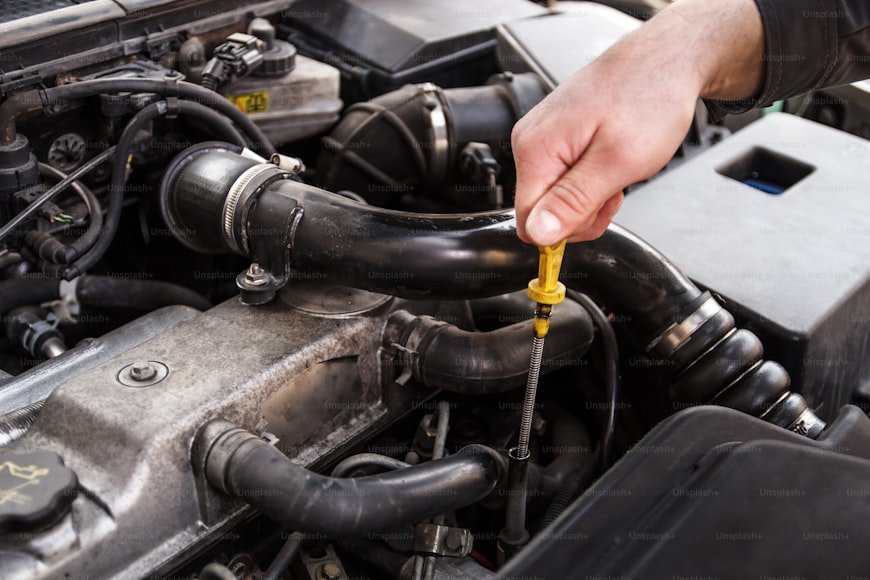
The oil dipstick on a Honda Pioneer 1000 is typically distinguishable by its bright color, often yellow or orange, which stands out against the darker hues of the surrounding engine parts.
This vivid coloration is intentional, allowing for easy identification even in low-light conditions.
The handle of the dipstick is ergonomically design for a comfortable grip.
Making it easy to pull out and push back in without much effort.
In addition to its distinct color, the oil dipstick may have specific markings or labels indicating its purpose.
Look for symbols such as an oil can icon or the word “OIL” imprinted on the handle.
These markings are standard across many models and serve to differentiate the dipstick from other components like transmission fluid dipsticks or other similar-looking parts.
The dipstick itself is a long, thin, metal rod that extends into the oil reservoir.
Upon extraction, you will notice markings towards the end of the dipstick, which help gauge the oil level.
These markings typically include a minimum (MIN) and maximum (MAX) level indicator.
Ensuring that you can accurately assess whether additional oil is need or if the levels are adequate.
Locating and identifying the oil dipstick in the Honda Pioneer 1000 is straightforward.
By familiarizing yourself with its color, markings, and ergonomic design, you can efficiently keep track of your engine’s oil levels, ensuring smooth and reliable operation of your vehicle.
Regular checks using the dipstick can prevent potential engine damage and extend the lifespan of your Honda Pioneer 1000.
Steps to Check the Oil Level
Checking the oil level on a Honda Pioneer 1000 is a straightforward process, yet it is crucial for maintaining the vehicle’s performance and longevity.
To begin, ensure that the vehicle is park on a level surface.
This is imperative for obtaining an accurate reading, as an inclined position can cause the oil to pool on one side of the engine, leading to a misleading measurement.
Start by location the oil dipstick, which is typically found near the engine.
The dipstick usually has a bright-colored handle for easy identification.
Once located, grasp the handle firmly and pull the dipstick out of its tube.
This initial removal allows you to clean off any oil that may have splashed onto the dipstick during operation, ensuring that the reading you take will be precise.
With the dipstick removed, use a clean, lint-free cloth to wipe off any oil.
It is important that the cloth is free of dirt and debris to avoid contaminating the oil.
After thoroughly cleaning the dipstick, reinsert it back into its tube, make sure it is fully seat.
This step ensures that the dipstick can accurately gauge the current oil level.
Next, remove the dipstick once more and observe the oil level.
The dipstick will have markings indicating the optimal oil range, usually marked with “Full” and “Add” lines.
The oil level should fall between these two marks. If it is below the “Add” line, additional oil will be necessary to reach the proper level.
Conversely, if it exceeds the “Full” line, some oil may need to be draine to avoid overfilling, which can cause engine damage.
By following these steps meticulously, you can ensure that the oil level in your Honda Pioneer 1000 remains within the recommended range.
Thus supporting the engine’s efficient operation and extending the vehicle’s overall lifespan.
Interpreting Oil Level Readings
Interpreting the oil level readings on your Honda Pioneer 1000’s dipstick is crucial for maintaining the optimal performance of your vehicle.
Understanding what different oil levels indicate can help you make informed decisions about necessary maintenance actions.
First and foremost, the dipstick is mark with two critical indicators:
the minimum and maximum oil levels. When you pull out the dipstick to check the oil, you should wipe it clean, reinsert it fully, and then pull it out again to get an accurate reading.
If the oil level is below the minimum mark, this indicates that the oil level is too low.
Operating the vehicle with insufficient oil can lead to increased engine wear and potential damage.
In such cases, it is essential to add oil immediately to bring the level within the acceptable range.
Be sure to use the type of oil recommended in your Honda Pioneer 1000’s owner’s manual.
If the oil level is between the minimum and maximum marks, this indicates a normal oil level.
This range signifies that your vehicle has the optimal amount of oil for proper lubrication and cooling of the engine components.
Regularly monitoring the oil level and maintaining it within this range is key to prolonging the engine’s lifespan and ensuring smooth operation.
If the oil level is above the maximum mark, this indicates an overfilled condition.
Overfilling can cause foaming and aeration of the oil, which reduces its lubricating efficiency and can lead to engine overheating.
In this situation, it is crucial to drain the excess oil to prevent potential damage.
Overfilling could also indicate other issues such as a malfunctioning oil pump or incorrect oil change procedures.
Accurate interpretation of the oil level readings not only ensures the longevity of your Honda Pioneer 1000 but also enhances its performance.
Regular checks and timely actions based on these readings are fundamental aspects of responsible vehicle maintenance.
Maintaining Optimal Oil Levels
Ensuring the oil levels in your Honda Pioneer 1000 are optimal is crucial for its longevity and performance.
Regular oil checks can prevent engine wear and ensure smooth operation.
It is recommend to inspect the oil level every 25 to 50 hours of operation or at least once a month if the vehicle is not frequently use.
This proactive approach helps in identifying potential issues early, saving on costly repairs.
The type of oil you use is equally important.
Honda recommends using SAE 10W-30 oil for the Pioneer 1000, which is design to provide superior lubrication and thermal stability.
Brands such as Honda GN4 or Mobil 1 are highly regard for their quality and compatibility with the Pioneer 1000.
Always ensure the oil you choose meets the API service classification of SG or higher.
Adding oil when necessary is a straightforward process.
Before adding oil, ensure the vehicle is on a level surface and the engine is cool.
Locate the oil dipstick, which is typically found near the engine.
Remove the dipstick, wipe it clean, reinsert it fully, and then remove it again to check the level.

If the oil is below the recommend mark, add oil in small increments, frequently checking the level to avoid overfilling.
Regular maintenance and timely oil changes are paramount.
An oil change should be perform every 100 hours of operation or at least once a year.
Fresh oil not only lubricates the engine but also helps in keeping it cool and free from contaminants.
Neglecting this can lead to reduced engine efficiency and potential damage.
By adhering to these best practices, you ensure that your Honda Pioneer 1000 remains in optimal condition, providing reliable performance and longevity.
Regular oil checks, using recommended oil types, and timely maintenance are key to preserving the health of your vehicle’s engine.


