
As a proud Honda Pioneer owner, you understand the thrill of off-road adventures.
Whether you’re tackling rugged trails, hauling gear, or simply enjoying the outdoors, your UTV is a vital part of the experience.
To ensure your Honda Pioneer continues to perform at its best and provides years of reliable service, regular maintenance is paramount.
And at the heart of that maintenance lies the humble, yet critical, oil change.
It’s not just about swapping out old fluids; it’s about protecting your engine, optimizing performance, and extending the life of your investment.
This comprehensive guide will delve into the Honda Pioneer oil change kit essentials, providing you with all the information you need to confidently perform this crucial maintenance task.
We’ll cover everything from the right type of oil and filters to essential tools and step-by-step instructions.
By understanding the components of a complete oil change kit and following best practices, you’ll not only save money on dealership services but also gain a deeper connection with your machine.
Let’s get ready to keep your Honda Pioneer running strong, mile after exhilarating mile!
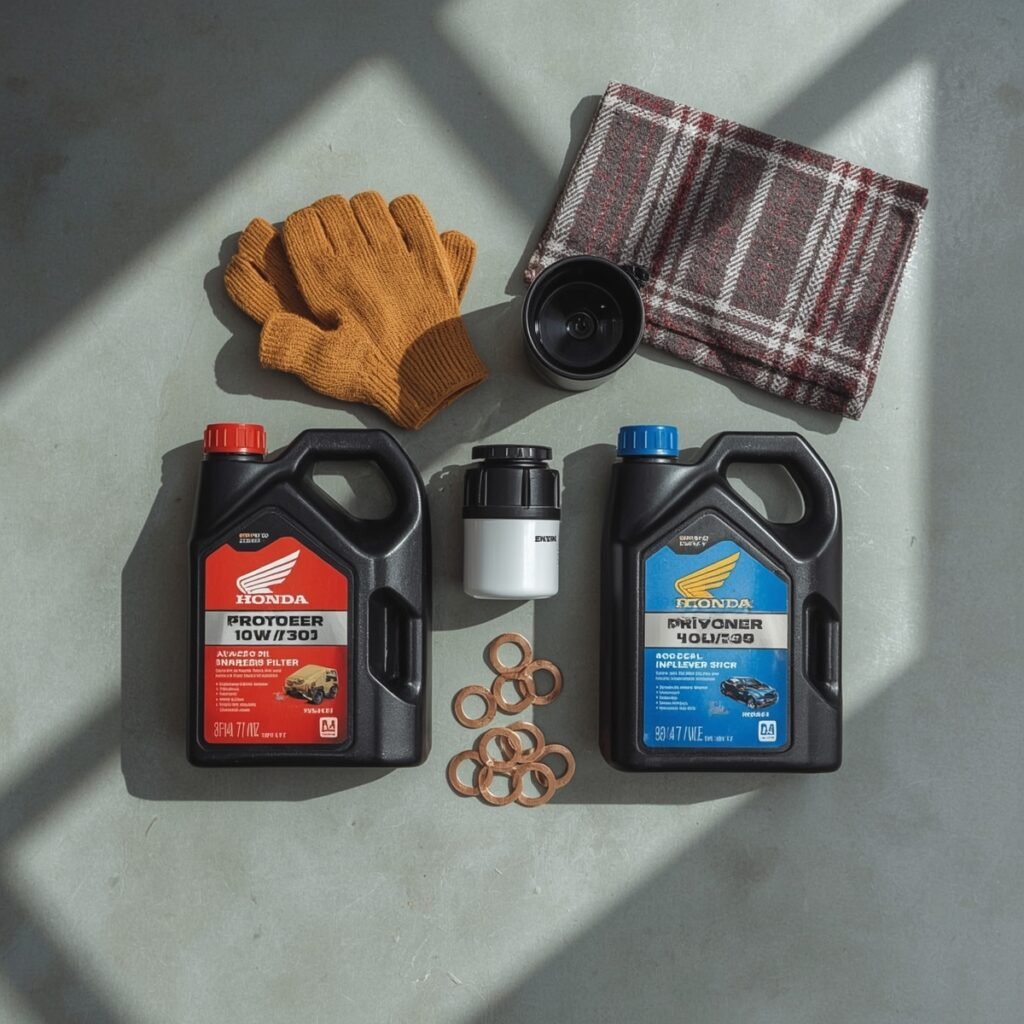
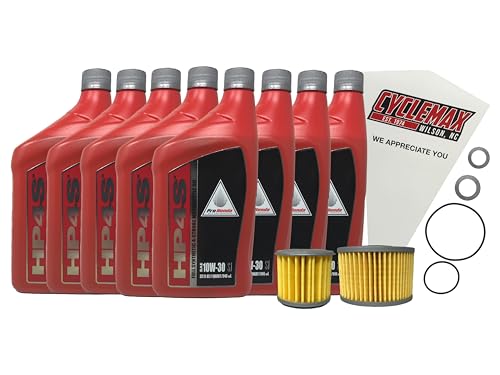
The Essential Components of a Honda Pioneer Oil Change Kit
Performing a successful oil change on your Honda Pioneer requires more than just a wrench and a drain pan.
A complete Honda Pioneer oil change kit typically includes several key components, each playing a vital role in maintaining your engine’s health.
Understanding these essentials will ensure you have everything on hand before you begin.
1. Engine Oil: The Lifeblood of Your UTV
Choosing the right engine oil is paramount.
Honda UTVs, including the Pioneer series, are designed to operate with specific oil types to ensure optimal performance and longevity, especially given their wet clutch systems.
Look for oils that meet or exceed the following specifications:
- Viscosity: Honda typically recommends 10W-30 or 10W-40 for most operating conditions [7]. Always refer to your specific Pioneer model’s owner’s manual for the exact recommended viscosity. Some owners opt for 0W-40 synthetic for extreme cold or high-performance use [2].
- JASO MA/MA2 Rating: This is crucial for UTVs with wet clutches. The JASO (Japanese Automotive Standards Organization) MA or MA2 rating indicates that the oil is suitable for motorcycles and ATVs with integrated wet clutches, preventing clutch slippage and ensuring smooth operation. Avoid oils labeled “Energy Conserving” or those without a JASO MA/MA2 rating, as they often contain friction modifiers that can harm your wet clutch [1].
- Synthetic vs. Conventional: While conventional oils are acceptable if they meet Honda’s specifications, many enthusiasts opt for synthetic oils due to their superior performance, stability, and extended drain intervals, especially under demanding off-road conditions. Brands like Shell Rotella T6 5W-40 synthetic are popular choices among UTV owners [4].
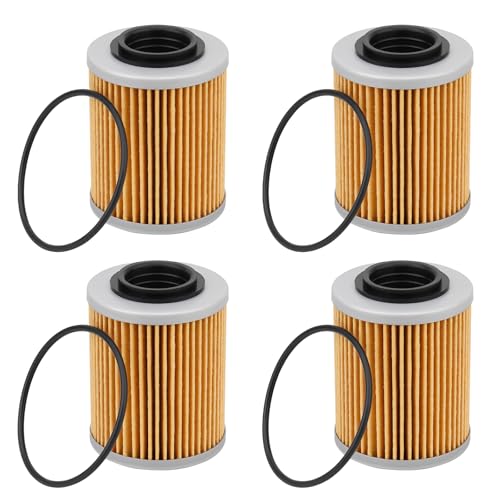
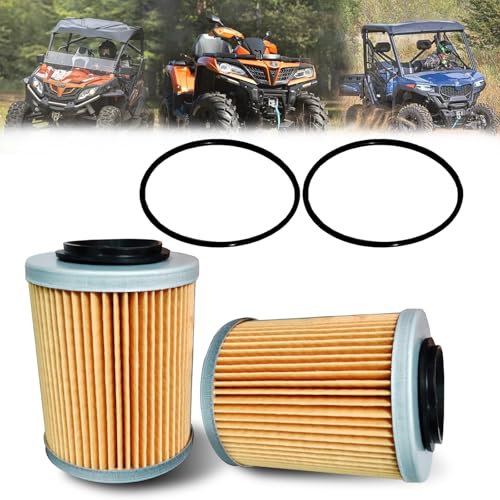
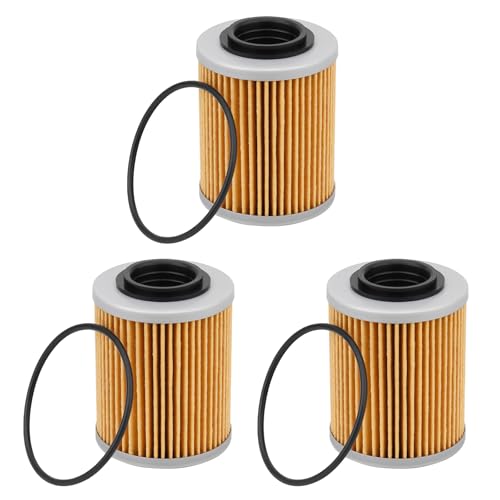
2. Oil Filters: Keeping it Clean
Your Honda Pioneer typically uses two oil filters: an engine oil filter and a DCT (Dual Clutch Transmission) filter.
Both are critical for filtering out contaminants and maintaining the cleanliness of your engine and transmission fluids.
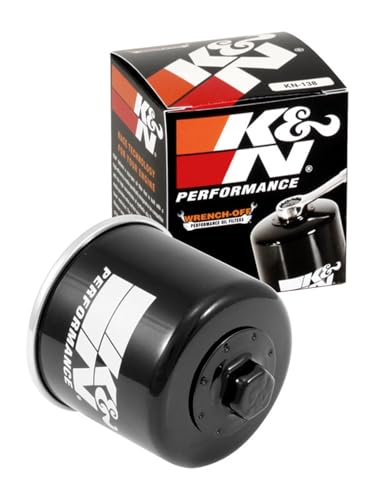
- Engine Oil Filter: This filter removes metallic particles, dirt, and other debris from the engine oil, preventing them from circulating and causing wear. It’s recommended to replace this every time you change your engine oil [8]. Genuine Honda oil filters are always a safe bet, but reputable aftermarket brands like K&N (KN-111 for some models) or Tusk also offer quality alternatives [6].
- DCT Filter: The DCT filter is specific to Honda Pioneer models equipped with the Dual Clutch Transmission. This filter ensures the cleanliness of the transmission fluid, which is vital for the smooth and efficient operation of the DCT. While the engine oil filter is changed with every oil change, the DCT filter typically has a longer service interval, often every other engine oil change or as specified in your owner’s manual [8].
3. Drain Plug Washers (Crush Washers): Preventing Leaks
Often overlooked, drain plug washers (also known as crush washers) are small but essential components.
These soft metal or fiber washers create a seal between the drain plug and the oil pan, preventing leaks.
They are designed to be crushed and deform slightly when tightened, ensuring a tight seal.
Reusing old crush washers can lead to leaks, so it’s highly recommended to replace them with new ones every time you remove the drain plug [1].
A complete kit will usually include washers for both the engine oil drain plug and the DCT drain plug.
4. Funnel and Drain Pan: Essential Tools
While not part of the ‘kit’ in terms of fluids and filters, a clean funnel and a suitable drain pan are absolutely essential for a mess-free oil change.
A large enough drain pan will prevent spills, and a clean funnel will ensure no contaminants enter your fresh oil.
By having all these components ready, you’ll be well-prepared to perform a thorough and effective oil change on your Honda Pioneer.
[1] “…make sure it is rated for wet clutch use, JASO-MA. Do not use any oil that has a label showing Energy …” – Honda Pioneer Forum, Which Engine Oil?
[2] “My dealer recommended a synthetic 0W-40 weight oil from Honda, at $10.00 per quart.
I will use Mobile 1 at half the price and it meets Honda service …” – Pioneer Forums, What is best oil to use [4] “For oil I use Shell Rotella T6 synthetic, 5W-40, it’s JASO MA2 certified for a wet clutch.”
– HONDASXS, Oil type for 2016 Pioneer 1000-5 deluxe [6] “Parts needed. A new oil filter. Honda part # 15412-KEA-003 or equivalent aftermarket of your choice.
I use a KN-111.” – Honda Pioneer Forum, 700 Oil and filter change guide.
[7] “You will also need 3.1 quarts of Honda GN4 4 stroke 10w-30, or another oil that meets Honda specifications.” – Honda Pioneer Forum, 700 Oil and filter change guide. [8] “The engine oil and filter needs to be replaced every 1200 miles.
The DCT filter only needs to be replaced every 2400 miles.” – HONDASXS, P1000 – Honda Pioneer 1000 Maintenance Schedule

Step-by-Step Oil Change Process: A DIY Guide
Performing an oil change on your Honda Pioneer is a straightforward process that can be easily done at home with the right tools and a little patience.
While specific steps might vary slightly depending on your Pioneer model (500, 700, or 1000), the general procedure remains consistent.
Always consult your owner’s manual for precise instructions and torque specifications for your specific model.
Tools You’ll Need:
- Honda Pioneer oil change kit essentials (engine oil, engine oil filter, DCT filter, crush washers)
- Socket wrench set (typically 10mm, 12mm, 17mm sockets)
- Torque wrench
- Oil drain pan (large enough to hold all fluids)
- Funnel
- Oil filter wrench (strap wrench or cap-style)
- Clean rags or shop towels
- Gloves
- Safety glasses
The Process:
-
Warm Up the Engine:
Run your UTV for a few minutes to bring the engine oil up to operating temperature. Warm oil flows more easily and carries more contaminants with it [3].
-
Prepare for Draining:
Park your Pioneer on a level surface. Lift the cargo bed (if applicable) and locate the engine and DCT drain plugs. Place your drain pan directly underneath to catch the old oil. For some models, you may need to remove a plastic access cover [9].
-
Drain Engine Oil:
Using the appropriate socket, carefully remove the engine oil drain plug. Allow all the oil to drain completely. Once drained, replace the old crush washer with a new one and reinstall the drain plug. Torque it to the manufacturer’s specifications (refer to your owner’s manual).
-
Replace Engine Oil Filter:
Locate the engine oil filter. Use an oil filter wrench to loosen and remove the old filter. Be prepared for some oil to spill. Apply a thin film of new oil to the rubber gasket of the new filter before installing it. Hand-tighten the new filter until snug, then turn an additional 1/4 to 1/2 turn, or as specified in your manual. Do not overtighten [6].
-
Drain DCT Fluid (if applicable):
If your Pioneer has a DCT, locate its drain plug. Remove it and allow the fluid to drain. Replace the old crush washer with a new one and reinstall the plug, torquing it to spec.
-
Replace DCT Filter (if applicable):
Locate and replace the DCT filter. Similar to the engine oil filter, apply a thin film of new fluid to the gasket of the new filter before installing. Hand-tighten until snug, then turn an additional 1/4 to 1/2 turn, or as specified.
-
Refill with New Oil:
Using a clean funnel, slowly add the recommended amount and type of new engine oil to your Pioneer’s engine. For most models, this will be around 3.1 quarts of 10W-30 or 10W-40 [7]. Check your owner’s manual for the exact capacity.
-
Check Fluid Levels:
Start the engine and let it run for a minute or two to circulate the new oil. Turn off the engine and wait a few minutes for the oil to settle. Check the oil level using the dipstick. Add more oil if necessary, ensuring it’s within the recommended range. For DCT models, check the DCT fluid level as well.
-
Inspect for Leaks:
Visually inspect all drain plugs and filters for any signs of leaks. If you see any, tighten the components slightly, but be careful not to overtighten.
-
Dispose of Old Oil:
Properly dispose of the used oil and filters at an authorized recycling center. Never pour used oil down the drain or onto the ground.
By following these steps, you can confidently perform your own oil changes, ensuring your Honda Pioneer remains in top condition for all your off-road adventures.
[3] “Step 1. Run the engine for a minute to warm the oil, then lift the rear cargo bed and remove the plastic access cover just behind the rear seats.” – Partzilla.com, How to Change Honda Pioneer 1000 Oil [6] “Parts needed.
A new oil filter.
Honda part # 15412-KEA-003 or equivalent aftermarket of your choice.
I use a KN-111.” – Honda Pioneer Forum, 700 Oil and filter change guide.
[7] “You will also need 3.1 quarts of Honda GN4 4 stroke 10w-30, or another oil that meets Honda specifications.” – Honda Pioneer Forum, 700 Oil and filter change guide. [9] “Step 1.
Run the engine for a minute to warm the oil, then lift the rear cargo bed and remove the plastic access cover just behind the rear seats.” – Partzilla.com, How to Change Honda Pioneer 1000 Oil

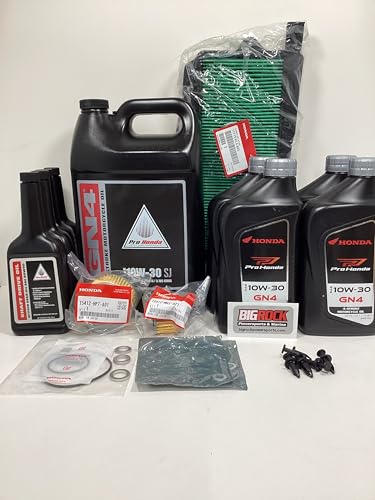
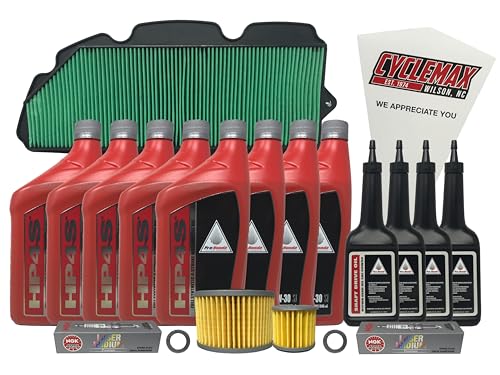
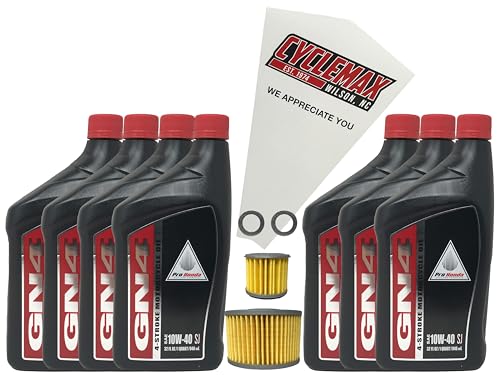
My Top Picks: Essential Honda Pioneer Oil Change Kits and Components
To make your life easier, many manufacturers and retailers offer complete Honda Pioneer oil change kit essentials.
These kits typically include the correct amount of engine oil, an engine oil filter, and the necessary crush washers. Some even include the DCT filter for models that require it.
Here are some top recommendations, often available on Amazon:
1. Genuine Honda OEM Oil Change Kits
For peace of mind and guaranteed compatibility, genuine Honda OEM (Original Equipment Manufacturer) oil change kits are always a solid choice.
These kits are specifically designed for your Honda Pioneer model and contain all the necessary Honda-branded fluids and filters.
They ensure you’re using components that meet Honda’s stringent quality and performance standards.
Why choose OEM?
Guaranteed Compatibility: Designed specifically for your Pioneer model.
Quality Assurance: Meets Honda’s high standards for performance and durability.
Convenience: All necessary parts in one package.
2. Aftermarket Complete Oil Change Kits (e.g., Tusk, SuperATV)
Several reputable aftermarket brands offer comprehensive oil change kits that provide excellent value and performance.
Brands like Tusk and SuperATV are popular among UTV enthusiasts for their quality and affordability.
These kits often include their own brand of oil, filters, and crush washers, all designed to meet or exceed OEM specifications.
Why choose Aftermarket Kits?
Cost-Effective: Often more budget-friendly than OEM kits.
Performance Options: Some aftermarket oils and filters may offer enhanced performance or filtration.
Accessibility: Widely available from various powersports retailers.
3. Individual Components: Build Your Own Kit
If you prefer to mix and match or already have some components, you can purchase individual Honda Pioneer oil change kit essentials separately.
This allows you to choose your preferred brand of oil, specific filters, and ensure you have fresh crush washers.
Key individual components to consider:
Engine Oil: Shell Rotella T6 5W-40 (JASO MA2 rated) or Amsoil 10W-30/10W-40 ATV/UTV oil.
Engine Oil Filter: K&N KN-111 (for some models) or other high-quality aftermarket filters.
DCT Filter: Ensure it’s compatible with your specific Pioneer model.
Crush Washers: Always have a supply on hand.
By selecting the right kit or individual components, you’ll be well-equipped to perform regular oil changes and keep your Honda Pioneer performing flawlessly on every adventure.
Conclusion: Keep Your Pioneer Roaring with Regular Oil Changes
Regular oil changes are the single most important maintenance task you can perform to ensure the longevity, performance, and reliability of your Honda Pioneer.
By understanding the Honda Pioneer oil change kit essentials – the right oil, quality filters, and fresh crush washers – you empower yourself to take control of your UTV’s health.
This proactive approach not only saves you money on costly repairs down the line but also gives you the confidence that your machine is always ready for the next adventure.
Remember, a well-maintained UTV is a happy UTV, and a happy UTV means more exhilarating rides and fewer headaches on the trail.
So, gather your kit, follow the steps, and enjoy the peace of mind that comes with knowing your Honda Pioneer is running strong, protected by fresh, clean oil. Happy trails!
What are your go-to oil change tips for your Honda Pioneer? Share your wisdom in the comments below! 👇🏼