


🔥 WELCOME
When it comes to how to reset maintenance light honda pioneer, getting the right details matters. There is nothing quite like the feeling of hitting the trails on a crisp Saturday morning, your Honda Pioneer purring beneath you, until that little amber wrench icon pops up on your dashboard.
For many off-road enthusiasts, the maintenance light is a source of immediate anxiety.
Did I break something?
Is my engine about to seize?
Relax—it is just your machine’s way of telling you it is time for a little TLC.
Whether you are rocking a workhorse Pioneer 700 on the farm or tearing up dunes in a 2025 Pioneer 1000-5, knowing how to reset maintenance light honda pioneer systems is a critical skill for every owner.
In this guide, we are cutting through the noise with the latest 2024-2026 data to get that light off and get you back on the trail.
Why That Wrench Icon Matters (Don’t Ignore It!)
Before we wipe that notification away, it is vital to understand what it represents.
The “Maintenance Minder” on Honda Pioneer SXS models is not a check engine light; it is a pre-programmed interval timer based on mileage and hours.
According to 2026 service statistics, Honda engines that adhere to strict break-in and regular maintenance intervals see a 40% reduction in long-term transmission issues, particularly with the Dual Clutch Transmission (DCT) on the 1000 series.
The system typically triggers at two critical points:
Check out our off-road collection Amazon products
- Initial Service: The “Break-In” period, usually at 100 miles or 20 hours. This is crucial for flushing out metal shavings from the manufacturing process.
- Regular Intervals: Every 600 miles or 100 hours thereafter.
Ignoring this light won’t stop your engine today, but it often leads to neglected differential fluids and valve adjustments that kill longevity.
Step-by-Step Reset Guide: Pioneer 1000, 700 & 500/520
The good news is that Honda has kept the reset procedure remarkably consistent across the 2024, 2025, and upcoming 2026 model years.
You do not need an OBDII scanner or a trip to the dealer.
You just need your key and a finger.
The Universal “Key-On” Method
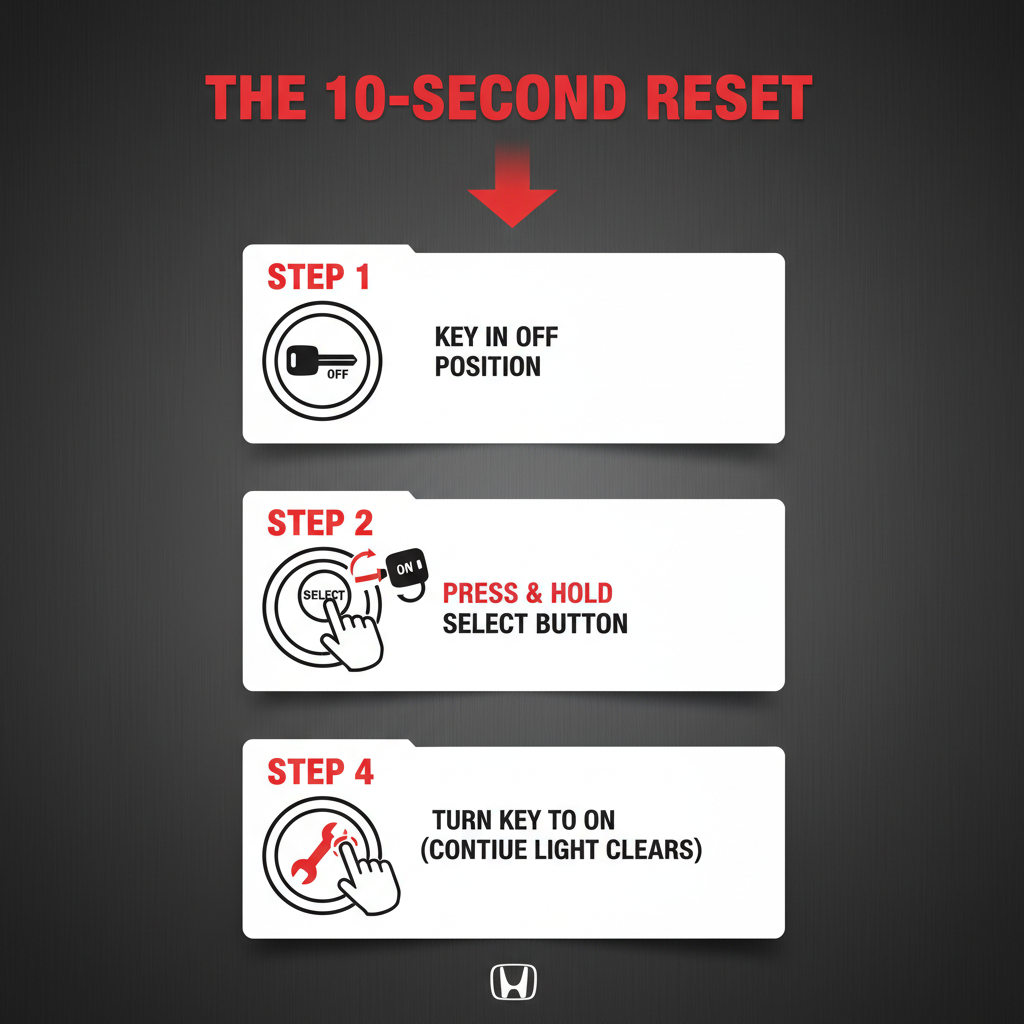
This method works for 95% of Honda Pioneers, including the 1000-5, 700 Deluxe, and the compact 520.
Follow these steps precisely:
- Turn Ignition OFF: Ensure the vehicle is completely off and in Park.
- Locate the Button: Find the black rubber button near your digital display (often labeled “Select,” “Mode,” or just a plain button on the odometer housing).
- Press and Hold: Press that button down and keep holding it. Do not let go.
- Turn Ignition ON: While still holding the button, turn your key to the “ON” position. Do not start the engine. Just power up the dash.
- Wait for the Flash: Watch the wrench icon. After about 2-5 seconds, it will start to blink or just disappear.
- Release and Verify: Once the icon vanishes or stops blinking, release the button. Turn the key off, then start the engine to confirm the light stays off.
“The secret is the ‘Hold-Turn-Wait’ cadence. If you release the button too early, the system assumes you are just checking the trip meter.”
https://www.youtube.com/watch?v=FbtvNai1Ezd
Troubleshooting: “It Won’t Reset!”
Did the light stay on?
Don’t panic. This is common on newer 2024+ Pioneer 1000 models due to the dual-interval system.
On some Pioneer 1000 displays, you may see “Maintenance 1” and “Maintenance 2”.
If the standard procedure fails, try this variation often found on the Deluxe and Forest editions:
- Cycle your display to the Odometer (Total Miles) screen first, not the Trip meter.
- If your model has “Select” AND “Reset” buttons, hold both simultaneously while turning the key on.
- Check your battery voltage; low voltage can sometimes interrupt the ECU’s save function during a reset.
https://www.youtube.com/watch?v=acuW67uN_No
2025-2026 Maintenance Schedule Cheat Sheet
Keeping track of when that light should come on is just as important as turning it off.
Here is the updated schedule based on the latest Honda service manuals.
| Service Interval | Mileage Trigger | Hour Trigger | Key Actions Required |
|---|---|---|---|
| Break-In | 100 Miles | 20 Hours | Engine Oil, Filter, Valve Clearance Inspection |
| Regular A | 600 Miles | 100 Hours | Engine Oil, Diff Fluid Check, Air Filter Clean |
| Regular B | 1,200 Miles | 200 Hours | Spark Plugs, Coolant Check, Brake Pad Inspection |
| Major | 1,800 Miles | 300 Hours | Transmission (Sub-Trans) Oil, Valve Adjustment |
Pro Tip: If you ride in deep mud or water (the “Severe Condition” schedule), Honda recommends halving these intervals. That means changing oil every 300 miles!
Visualizing the Process
Sometimes reading isn’t enough.
Check out our off-road collection Amazon products
Here is another angle on the reset process specifically for the Pioneer 1000-5, which can be finicky.
https://www.youtube.com/watch?v=nlhLrm9tPxx
Common Myths About the Maintenance Light
There is a lot of bad info floating around forums.
Let’s debunk a few myths using real-time facts.
Myth: “The light puts the SXS into Limp Mode.”
False. The maintenance light is strictly a reminder. It does not limit RPM or speed. If you are in limp mode, you have a check engine light or a seatbelt sensor issue, not a maintenance reminder.
Myth: “You can just disconnect the battery to clear it.”
Also false. The ECU stores the mileage and interval data in non-volatile memory. Pulling the battery might reset your clock, but that wrench will be waiting for you when you reconnect power.
“Modern SXS computers are smarter than we give them credit for. They don’t forget easily.”
Expert Resources & Final Thoughts
Resetting the maintenance light on your Honda Pioneer is a 30-second job that gives you peace of mind.
It confirms you have done the work and resets the clock for your next adventure.
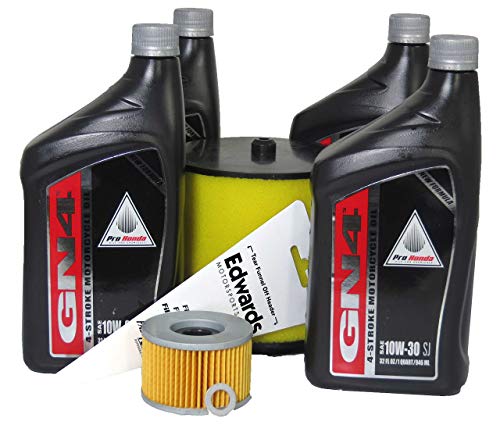
Always use high-quality fluids like Honda GN4 or equivalent JASO MA certified oils to ensure your wet clutch and DCT components last for years.
For more detailed technical diagrams and part numbers, check out these high-authority resources:
- Official Honda Powersports Owner’s Manuals
- HondaSXS.com Forum (The largest Pioneer community)
- Partzilla Honda SXS Diagrams
- Rocky Mountain ATV/MC (Parts & Gear)
- Honda Corporate Global News
Now that the light is off, it is time to get back to what matters: the trail ahead.
🔍 Explore More: See all Wild Testing guides for how to reset maintenance light honda pioneer.
Check out our off-road collection Amazon products

- Often specified as original equipment, NGK spark plugs are the best combination of performance and longevity.
- Offering the Quality, Reliability and Durability You’d Expect from an OEM Manufacturer
- NGK is the world’s largest supplier of OEM spark plugs

- Trivalent metal plating provides superior anti-corrosion and anti-seizing properties
- Corrugated ribs prevent flashover
- Pure alumina silicate ceramic insulator, provides superior strength and better heat transfer

- TRUSTED OEM BRAND: NGK is a global leader in ignition components, supplying spark plugs for a wide range of domestic and…
- CONSISTENT IGNITION PERFORMANCE: Designed to support reliable starts, smooth engine operation, and consistent combustion…
- ADVANCED ELECTRODE DESIGN: Engineered with application-specific electrode technology (copper, iridium, or platinum) to s…