
🔥 Welcome
When it comes to honda pioneer 500 paddle shift stuck, getting the right details matters. If you are reading this, you are likely sitting on a trail with a Honda Pioneer 500 that refuses to shift gears, or perhaps you are staring at a dashboard flashing a mysterious code.
The “Honda Pioneer 500 paddle shift stuck” issue is one of the most frustrating problems for owners, but the good news is that it is rarely a catastrophic transmission failure.
As we move through 2025 and look toward 2026, the data from enthusiast forums and service centers points to a few specific electrical and maintenance culprits that are surprisingly easy to fix.
Whether you are dealing with a blinking “8” on your gear indicator or a paddle that feels dead, this guide covers the latest troubleshooting steps.
The “Christmas Tree” Dash: What the Codes Mean
When your paddle shifters stop responding, your Pioneer’s Electronic Control Unit (ECU) often tries to tell you why.
You might see the gear position indicator flashing a specific number of times.
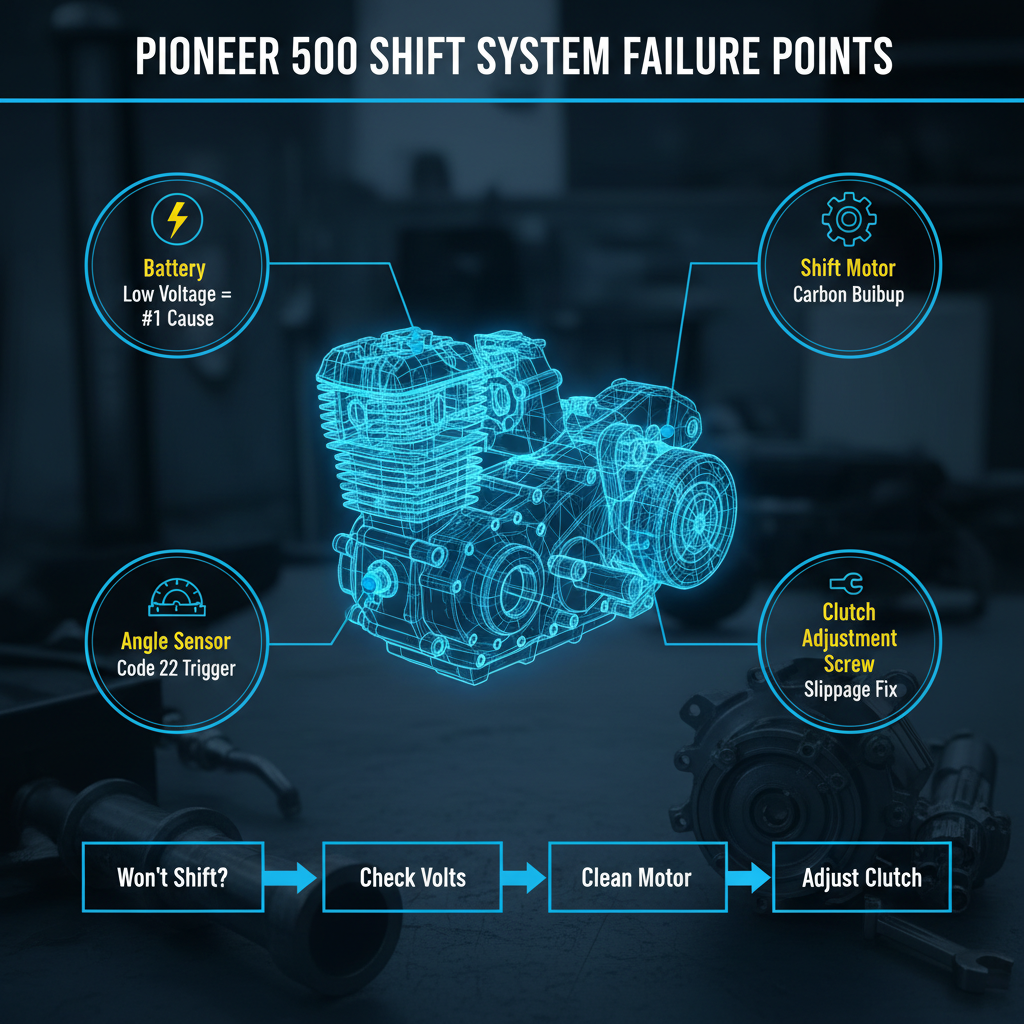
A common pattern is 8 flashes, which typically indicates a problem with the angle sensor system or the circuit related to it.
Another frequent code is 22, often linked to the shift motor locking up or failing to move the shift drum.
Unlike the mechanical linkage issues of older ATVs, the Pioneer 500 uses an electric shift program (ESP) that relies heavily on clean voltage and precise sensor readings.
Before you start tearing apart the engine, you need to rule out the simplest, most common offender.
Step 1: The Battery Voltage Trap
It sounds too simple to be true, but a weak battery is responsible for an estimated 60% of all shifting issues in the Pioneer 500.
Even if your machine starts up fine, the shift motor requires a significant surge of current to actuate the gears.
Check out our off-road collection Amazon products
If your battery voltage drops below 12.4 volts under load, the ECU may preserve power by disabling the shift motor, leaving you stuck in gear.
This is especially common in 2024 and 2025, as many original batteries in older models are reaching the end of their lifecycle.
TROUBLESHOOTING TIP: Load test your battery immediately; if it dips below 10V while cranking, replace it before buying expensive sensors.
https://www.youtube.com/watch?v=FnsRQxV4nwc
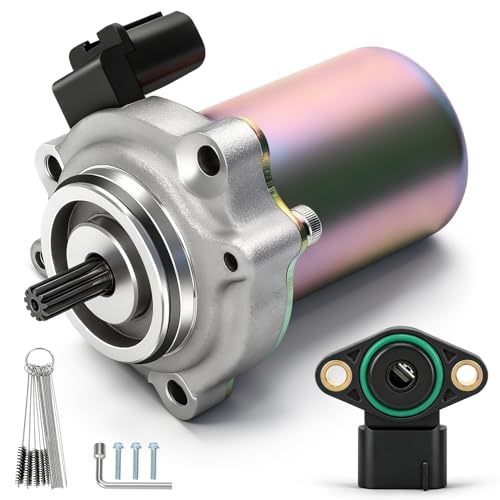
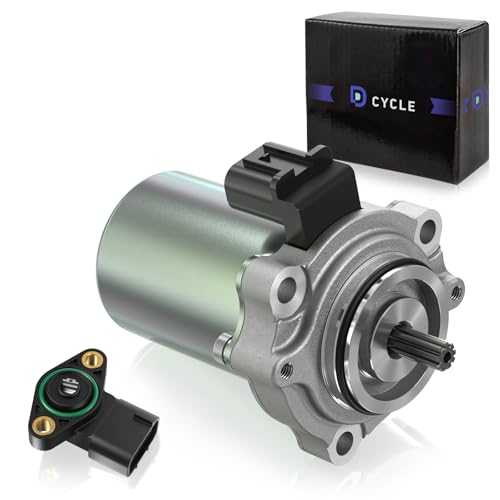
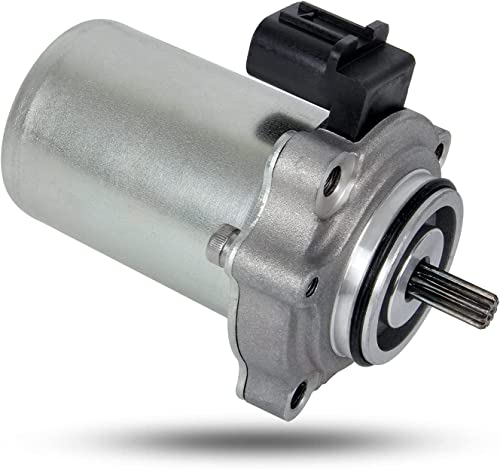
Step 2: The Shift Motor Cleaning Ritual
If your battery is fresh, the next culprit is usually the shift motor itself, located on the front of the engine crankcase.
Over time, carbon dust from the brushes builds up inside the motor housing, creating a conductive paste that shorts out the armature.
This doesn’t mean the motor is dead; it just means it’s dirty.
A simple service involves removing the shift motor, cleaning the commutator with fine grit sandpaper, and blowing out the carbon dust with compressed air.
Many owners report that this 30-minute “cleaning ritual” restores shifting performance better than a brand-new aftermarket part.
Be careful when reassembling to align the splines correctly, or you will find yourself unable to find neutral.
https://www.youtube.com/watch?v=23d-r_08kIs
Step 3: Clutch Adjustment Lag
Does your Pioneer shift, but with a noticeable delay or “lag” after you pull the paddle?
This is often a symptom of a clutch that is out of adjustment, rather than a stuck electrical switch.
The Pioneer 500 has a manual adjustment screw on the front engine cover that compensates for clutch plate wear.
“A properly adjusted clutch engages immediately, giving you that crisp, instant snap when you hit the paddle,” notes a leading Honda forum moderator.
You will need a 14mm wrench and a flathead screwdriver to perform this adjustment.
| Adjustment Step | Action Required | Expected Result |
|---|---|---|
| Loosen Lock Nut | Turn 14mm nut counter-clockwise | Releases the tension on the adjuster screw. |
| Find Resistance | Turn screw clockwise until resistance is felt | Locates the contact point of the clutch lifter. |
| Set Final Position | Back off counter-clockwise 1/4 turn | Ensures proper free play for smooth shifting. |
https://www.youtube.com/watch?v=kLGVVW9rXrh3
Step 4: The Angle Sensor & Wiring Gremlins
The angle sensor tells the computer exactly which gear the transmission is in.
Check out our off-road collection Amazon products
If this sensor gets wet, cracks, or has a corroded connector, the ECU will not know if it is safe to shift, and will default to a “stuck” state to protect the engine.
In 2026, we are also seeing more reports of wiring harness damage where the wires route under the starter motor.
Inspect the wiring loom near the rear of the engine for any signs of chafing or exposed copper, which can cause intermittent shorting.
If you replace the sensor, ensure you “preload” it correctly during installation, or your gear indicator will display dashes instead of numbers.
Emergency Fix: The Manual Shift Tool
If you are miles from home and the electric shift system is completely dead, do not panic.
Honda included a failsafe: the emergency manual shift tool.
- Locate the tool in your kit (usually under the seat) or use a 12mm wrench.
- Find the shift spindle on the engine case, near the shift motor.
- Manually rotate the spindle to change gears—it will require some force to overcome the detent.
- This will get you back to the trailer or campsite without needing a tow.
“The manual shift tool is the most underused feature on the Pioneer 500—learn where it is before you need it.”
Preventative Maintenance for 2026
Keeping your Pioneer 500 shifting smoothly requires proactive care.
Use dielectric grease on all electrical connectors, especially those low on the frame that see water crossings.
Invest in a high-quality battery tender to keep your voltage optimized when the machine is parked.
Lastly, change your oil regularly using GN4 or equivalent motorcycle oil; standard automotive oil contains friction modifiers that can cause the wet clutch to slip, confusing the shift logic.
By following these steps, you can banish the “honda pioneer 500 paddle shift stuck” nightmare and get back to enjoying the trails.
https://www.youtube.com/watch?v=F5SoLEqZdBs
🔍 Explore More: See all Wild Testing guides for honda pioneer 500 paddle shift stuck.
Check out our off-road collection Amazon products

- [Perfect Compatibility]: This Gleegi EVA carrying case is compatible with NOCO smart battery charger (CASE ONLY). It off…
- [Adjustable Strap Design]: Equipped with 2 adjustable straps to secure your battery charger in a stable position—prevent…
- [Durable & Shockproof Protection]: Built to withstand tough conditions, this case combines a rugged EVA shell with a pre…

- Permanently mount a battery connection to any battery. .Fit Type: Universal Fit
- Lie-flat design for seamless installations with M10 hole size.
- Built-in 20A micro-blade fuse for increased safety and protection.

- Permanently mount a battery connection to any battery.
- Lie-flat design for seamless installations with M6 hole size.
- Built-in 20A micro-blade fuse for increased safety and protection.