

Unmasking the Silent Enemy: Why Your Pioneer 700 Muffler Rots
When it comes to honda pioneer 700 muffler rust repair, getting the right details matters. Every Honda Pioneer 700 enthusiast knows the thrill of conquering rugged trails and navigating challenging terrain. 🏞️
However, beneath the gleaming exterior of your trusty side-by-side lies a vulnerable component often subjected to the harshest elements: the exhaust system. 🛠️
Rust, the relentless enemy of metal, poses a significant threat to your muffler and overall exhaust integrity. 😩
Understanding why rust forms on your Honda Pioneer 700 muffler is the first critical step toward effective prevention and repair.
At its core, rust is an electrochemical process where iron reacts with oxygen and water to form iron oxides. 🧪
For an off-road vehicle like the Pioneer 700, the conditions are often ripe for this destructive reaction. 💧
Frequent exposure to mud, water crossings, and even salty trail conditions accelerates corrosion. 🧂
Furthermore, the extreme heat cycles experienced by the exhaust system, from scorching hot during operation to cooling down afterwards, create condensation that traps moisture against the metal surfaces, further promoting rust formation.
Many factory exhaust systems, including those on earlier Honda Pioneer 700 models, utilize aluminized steel tubing.
While an improvement over mild steel due to the infused aluminum’s resistance to corrosion, these systems often suffer from a critical flaw: the welds.
Welds are frequently made with mild steel welding wire and are not treated with the same corrosion-resistant properties as the tubing itself.
This leaves the exposed steel welds highly susceptible to rust when they come into contact with water, mud, or salt.
Over time, these vulnerable points become the initial breeding grounds for rust, eventually compromising the entire system. 📉
Spotting the Sizzle: Early Warning Signs of Muffler Rust
Catching rust early can save you significant time, money, and hassle. 💸
Regular inspections are paramount for Honda Pioneer 700 owners, especially those who frequently encounter wet or muddy conditions. 👀
One of the most common early indicators of exhaust system distress is a change in your UTV’s exhaust note. 📢
A louder-than-usual rumble, a distinct hissing, or a ticking sound, particularly when the engine is cold, can signal a small leak or developing perforation in the muffler or exhaust pipe.
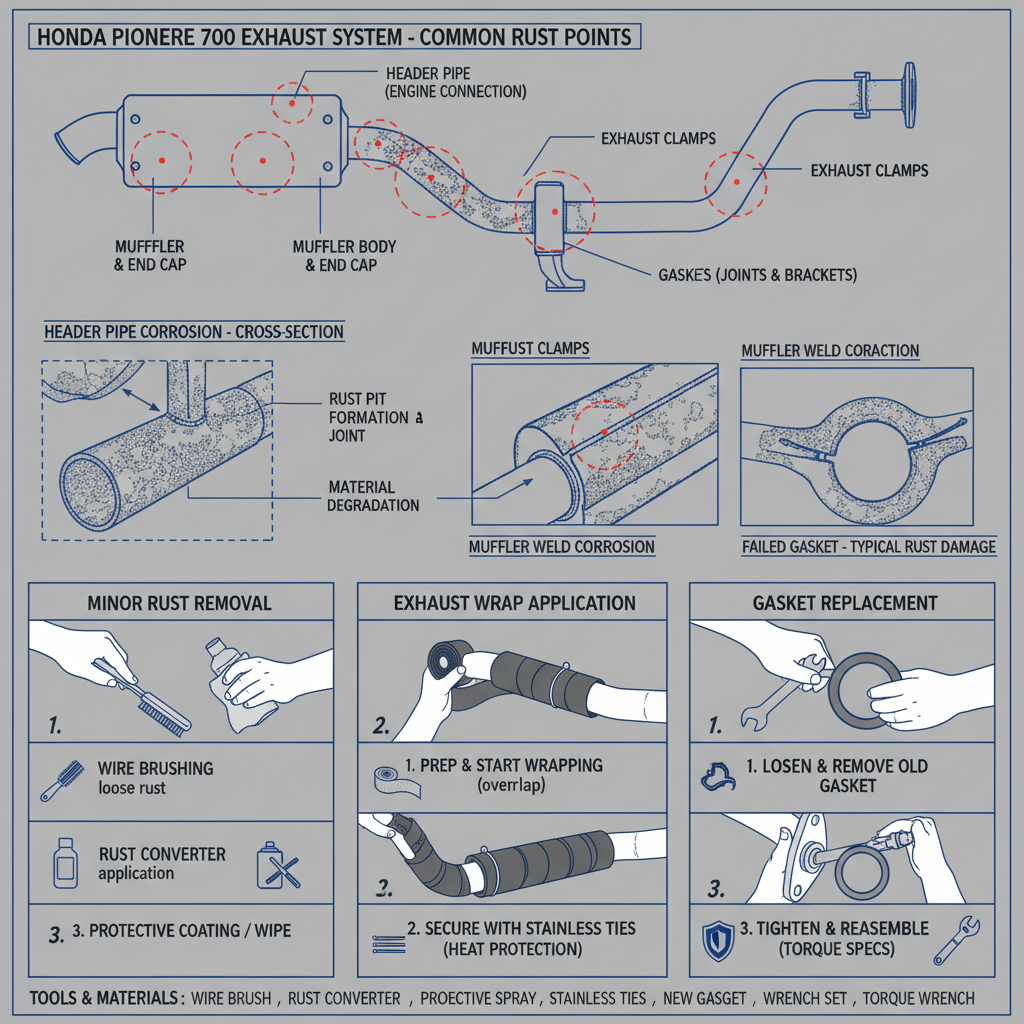
Visually, look for reddish-brown discoloration, flaking metal, or bubbling paint on the muffler and connecting pipes. 🔍
Pay close attention to clamps, brackets, and especially the exhaust gaskets, as these are common areas for rust to take hold and leaks to begin.
For instance, issues with exhaust gaskets on 2024 Honda Pioneer 700 models have been noted, particularly in regions with frequent water exposure.
Feel around the exhaust pipe for any signs of exhaust gas escaping, which often indicates a compromised seal or a small hole. 💨
Soot buildup around a joint or seam is another tell-tale sign of a leak. ⚫
Don’t forget to inspect the connection point between the header pipe and the muffler, as this is a high-stress area where gaskets frequently fail.
The Ripple Effect: How Rust Impacts Your Pioneer’s Performance
Beyond the unsightly appearance, a rusted muffler can have a cascading effect on your Honda Pioneer 700’s performance, safety, and your overall riding experience. 😕
A compromised exhaust system, especially one with leaks, leads to a loss of back pressure, which can negatively impact engine efficiency and horsepower. 📉
While the Honda Pioneer 700 is renowned for its durability and “refined engineering” that reduces noise and vibration in later models like the 2026 version, rust can counteract these advancements, leading to increased noise levels and potentially uncomfortable vibrations. [cite: 5 (first search)]
More critically, exhaust leaks can pose a significant health risk. 💀
Carbon monoxide, a colorless and odorless gas, can seep into the cabin, especially at low speeds or when idling, leading to symptoms like dizziness, nausea, and even loss of consciousness. ⚠️
A heavily rusted muffler can also fail catastrophically, potentially detaching from the vehicle while in motion, creating a hazard for both the driver and others on the trail. 💥
The integrity of the mounting points and hangers can be compromised by rust, leading to increased stress on other parts of the exhaust system and accelerating further damage.
Shielding Your Steed: Proactive Rust Prevention Strategies
Check out our off-road collection Amazon products
Preventative maintenance is your best defense against muffler rust. 🛡️
Adopting a few key practices can significantly extend the life of your Honda Pioneer 700’s exhaust system. 💪
Regular and thorough cleaning, especially after mudding or water crossings, is crucial. 🧼
Ensure you rinse off any mud, dirt, and corrosive elements from the entire exhaust system, paying special attention to crevices and joints. 🚿
Once clean, allow the system to dry completely to prevent moisture from lingering and initiating rust. 🌬️
Consider applying high-temperature ceramic coatings or rust-inhibiting sprays specifically designed for exhaust components.
These products create a protective barrier against moisture and corrosive agents. 🧤
When parking your Pioneer for extended periods, especially in humid environments, store it in a dry, well-ventilated area, or use a cover to protect it from condensation and environmental moisture. 🏡
Regularly inspect and tighten all clamps and bolts, as loose connections can allow moisture ingress and accelerate localized corrosion. [cite: 1, 4 (second search)]
Promptly address any small rust spots with a wire brush and rust converter to prevent them from spreading. 🖌️
“An ounce of prevention is worth a pound of cure, especially when battling the relentless advance of rust on your Honda Pioneer.”
Hands-On Restoration: A DIY Guide to Honda Pioneer 700 Muffler Rust Repair
Tackling muffler rust repair on your Honda Pioneer 700 can be a rewarding DIY project, saving you money and giving you a deeper understanding of your machine. 🔧
However, safety should always be your top priority. 👷
Ensure your UTV is parked on a level surface, the transmission is in park, and the parking brake is engaged. [cite: 4 (second search)]
Allow the exhaust system to cool completely before you begin to avoid severe burns. 🔥🧊 [cite: 4 (second search)]
Key Insights on honda pioneer 700 muffler rust repair: Step 1: Thorough Assessment and Tool Gathering 🧰
Before you start, perform a detailed inspection to gauge the extent of the damage. 🕵️♂️
Identify all rusted areas, holes, or weakened joints. Prepare your workspace and gather essential tools:
| Category | Tools/Materials | Purpose |
|---|---|---|
| Safety Gear | Safety glasses, gloves, dust mask | Protection during work |
| Cleaning/Prep | Wire brush, sandpaper, degreaser, rust converter | Removing rust, prepping surface |
| Disassembly | Socket set (12mm for clamps), wrenches, penetrating oil, screwdrivers, pry tool | Removing muffler, heat shield, clamps |
| Repair (Minor) | High-temp exhaust paint, exhaust repair putty/wrap | Sealing small holes, protecting surface |
| Repair (Major) | Angle grinder with cut-off wheel, welding machine, new exhaust pipe sections, muffler clamps | Cutting out damaged sections, welding in new pipe |
| Reassembly | New exhaust gaskets, anti-seize compound, silicone spray/grease [cite: 4 (second search)] | Ensuring proper seals and easy installation |
Step 2: Disassembly of the Exhaust System 🔩
Begin by removing the heat shield covering the muffler, usually secured by several small bolts. [cite: 4 (second search)]
Carefully store the heat shield and its hardware, as it will be reinstalled later. 📦
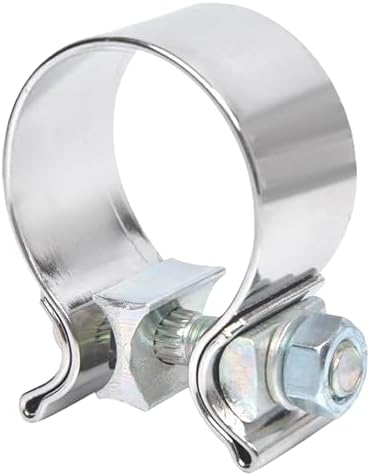
Next, loosen the clamp connecting the head pipe to the muffler’s inlet pipe. [cite: 4 (second search)]
Many Honda Pioneer 700 models utilize 12mm bolts for these clamps.
You may need to pry on it gently with a screwdriver to help it open.
Remove any bolts securing the exhaust support brackets. [cite: 4 (second search)]
If your Pioneer 700 has an oxygen sensor, carefully unplug and unclip it from the wiring harness before completely removing the muffler. [cite: 4 (second search)]
Finally, carefully pull back on the silencer (muffler) to disconnect it from the head pipe and slide it off the mounting pins. [cite: 4 (second search)]
A little silicone spray or grease on the mounting pins can make removal easier, especially if they are stuck in rubber grommets. [cite: 4 (second search)]
Step 3: Repairing the Rust Damage 🩹
The repair method depends on the severity of the rust. ⚙️
Minor Surface Rust: Use a wire brush or sandpaper to remove all loose rust. Apply a rust converter product, then finish with several coats of high-temperature exhaust paint. This is ideal for preventing future rust but not for sealing holes.
Small Holes or Cracks: For minor perforations, high-temperature exhaust repair putty or an exhaust wrap can provide a temporary or semi-permanent seal. Ensure the surface is clean and dry before application.
Major Rust Damage or Large Holes: This requires a more involved repair. If a section of pipe or the muffler itself is severely rusted through, it’s often best to cut out the damaged section.
Using an angle grinder with a cut-off wheel, carefully remove the compromised metal.
Then, weld in a new piece of exhaust tubing to bridge the gap.
Alternatively, for a less invasive DIY fix, some enthusiasts have successfully created “extensions” using off-the-shelf plumbing parts and muffler clamps purchased from online retailers like Amazon to address header pipe leaks.
This involves cutting the pipe to size, sliding a larger diameter piece over the header, securing it with a muffler clamp, and ensuring a new exhaust gasket creates a tight seal.
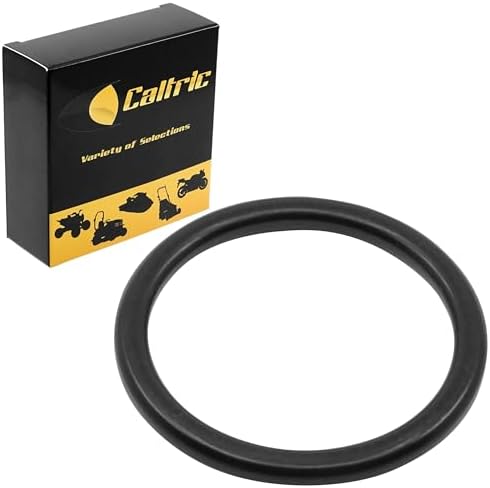
Always replace worn-out exhaust gaskets between the header pipe and muffler, as these are critical for sealing exhaust leaks.
The correct donut gasket for your Honda Pioneer 700 model year is essential for a proper fit.
Step 4: Reassembly and Final Checks ✅
Once repairs are complete, it’s time to reassemble your exhaust system. 🔄
If you removed the oxygen sensor, transfer it to the midpipe, applying a small amount of anti-seize to the threads, being careful not to get it on the sensor tip. [cite: 4 (second search)]
Slide any new clamps onto the pipes. [cite: 4 (second search)]
Lightly lubricate the muffler’s mounting pins with silicone spray or grease to help them slide into the rubber grommets easily. [cite: 4 (second search)]
Carefully align the midpipe and silencer inlet, ensuring the pipes seat fully into one another. [cite: 4 (second search)]
Check out our off-road collection Amazon products
Loosely re-install any support bracket hardware. [cite: 4 (second search)]
Before tightening everything down, check for proper alignment and clearance of all components. 📏
Once satisfied, tighten the support hardware, then the clamp between the midpipe and headpipe. [cite: 4 (second search)]
Reconnect the oxygen sensor to the wiring harness and secure it. [cite: 4 (second search)]
Finally, reinstall the heat shield using the original bolts. [cite: 4 (second search)]
After reassembly, start your Pioneer 700 and listen carefully for any exhaust leaks. 👂
Visually inspect around all connections for any escaping gases or unusual sounds. 💨
It’s a good practice to put your hand near the joints (carefully, as it heats up quickly) to feel for any leaks.
When to Call in the Pros: Knowing Your Limits 🧑🔧
While DIY repair is empowering, there are times when professional help is the wisest course of action. 🤷♀️
If you encounter severe, widespread rust that compromises the structural integrity of multiple exhaust components, or if welding is required and you lack the necessary skills and equipment, a professional mechanic is recommended. 👨🏭
Complex exhaust issues, such as those affecting catalytic converters or exhaust manifolds, also typically warrant expert intervention. 🛑
A professional can accurately diagnose hidden problems, perform specialized welding, and ensure your Honda Pioneer 700 meets all safety and emissions standards.
“Sometimes, the best tool in your toolbox is a trusted professional.”
Beyond the Fix: Aftermarket Solutions and Ongoing Maintenance
Once you’ve addressed the rust, consider aftermarket upgrades to enhance your Honda Pioneer 700’s exhaust system and prevent future corrosion. ✨
Many companies offer stainless steel exhaust systems or slip-on mufflers that provide superior rust resistance and often improved performance. 🚀
For example, HMF offers slip-on installation instructions for their aftermarket exhausts, which are a popular upgrade for performance-minded owners. [cite: 4 (second search)]
These systems are built to withstand the rigors of off-road environments better than factory components.
Establishing a regular maintenance schedule for your exhaust system is key to its longevity. 📆
Incorporate visual inspections into your pre-ride checks and post-ride cleaning routines. 🧐
Pay attention to any changes in engine sound or performance. 🎶
Replacing exhaust gaskets proactively, especially if you frequently ride in wet conditions, can prevent minor leaks from escalating into major rust problems.
By staying vigilant and proactive, you can ensure your Honda Pioneer 700 remains a reliable and powerful companion for all your adventures. 💖
https://www.youtube.com/watch?v=1F_454FwG0o
https://www.youtube.com/watch?v=F3vX4bF2s1w
https://www.youtube.com/watch?v=Yf-02gV2m3I
- Explore the latest Honda Pioneer 700 models and accessories on Honda’s official site.
- Find detailed installation instructions for aftermarket HMF exhausts, including the Pioneer 700, to guide your upgrades. [cite: 4 (second search)]
- Browse exhaust gaskets and other replacement parts suitable for your Honda Pioneer 700 on eBay.
- Discover general exhaust repair techniques and products on Eastwood’s blog for comprehensive rust solutions. [cite: 5 (second search)]
- Join the conversation and explore various accessories and modifications for your Pioneer 700 on the HondaSxS forums. [cite: 4 (first search)]
The longevity of your Honda Pioneer 700’s exhaust system, especially its muffler, rests squarely on consistent attention and timely intervention. 🏆
Rust is an inevitable adversary in the world of off-roading, but it doesn’t have to spell the end for your muffler. 🚫
By understanding its causes, recognizing early signs, and applying the right preventative and repair strategies, you can significantly extend the life and performance of your UTV. 💯
Whether it’s a simple wire brushing and painting job or a more complex gasket replacement, taking proactive steps ensures your Pioneer 700 continues to deliver reliable adventures for years to come. 🛣️
<
🔍 Explore More: See all Wild Testing guides for honda pioneer 700 muffler rust repair.
Check out our off-road collection Amazon products

- Order Includes: 1 x Exhaust Muffler Gasket, 1 x Exhaust Muffler Gasket, 1 x Exhaust Muffler Gasket
- Compatible With Honda Models: Pioneer 700 SXS700M2 2014-2023, Pioneer 700 SXS700M2D Deluxe 2017-2023, Pioneer 700 SXS700…
- Pioneer 700-4 SXS700M4 2014-2023, Pioneer 700-4 SXS700M4D Deluxe 2017-2023, Pioneer 700-4 SXS700M4D Forest 2023

- Two stroke kit includes O-rings, springs, washer, and gasket. Where applicable.
- KTM four stroke kits include header gasket and replacement springs.
- Four stroke kits contains header gasket.
- Order Includes: 1 x Muffler Gasket
- Compatible With Honda Models: Cb750 Nighthawk 1991-2003, Cbr1100xx Super Blackbird 1997-2003, Sxs700m2 Pioneer 700 2014-…
- Part Number: 18291-MW3-670