
When it comes to wiring light bar to ignition power utv, getting the right details matters. Embarking on night rides or tackling challenging low-light conditions in your Honda Pioneer requires top-tier illumination. 💡
A powerful LED light bar is an essential upgrade for any serious off-road enthusiast, transforming your nighttime adventures. ✨
However, simply slapping a light bar on and hooking it directly to your battery is a common pitfall that can lead to frustrating dead batteries and potential electrical issues. 🔋⛔
The smartest and safest approach is to properly integrate your light bar with your UTV’s ignition power, ensuring it only operates when your Honda Pioneer is running. This guide, crafted for Honda Pioneer owners from the 2024 to 2026 models and beyond, will illuminate the path to a flawless installation. 🛠️
“Safety and reliability are paramount when integrating aftermarket electronics into your UTV. Cutting corners can cost you more than just time.”
Why Ignition Power is Your Best Friend 🤝
Wiring your light bar to ignition power means it receives electricity only when the key is turned, preventing accidental battery drain. 🔑
Imagine leaving your light bar on inadvertently after a long day on the trails, only to return to a UTV that won’t start – a nightmare scenario that can easily be avoided. 😩
Modern UTVs, including the robust Honda Pioneer series, are equipped with sophisticated electrical systems. Tapping into the ignition circuit correctly ensures your new light bar integrates seamlessly without overloading factory circuits. ⚡
According to recent industry trends, over 65% of UTV owners install aftermarket lighting, with a significant increase in demand for integrated, ignition-switched solutions in 2026. This highlights the growing awareness among enthusiasts for reliable power management. 📈
Many aftermarket light bar harnesses come with simple positive and negative leads. However, directly connecting these to a constant power source without a relay and an ignition trigger can draw constant current, even if minimal, leading to battery depletion over time.
This proactive approach to wiring safeguards your battery and preserves the integrity of your Honda Pioneer’s electrical system for years of dependable off-road action. 🔋✅
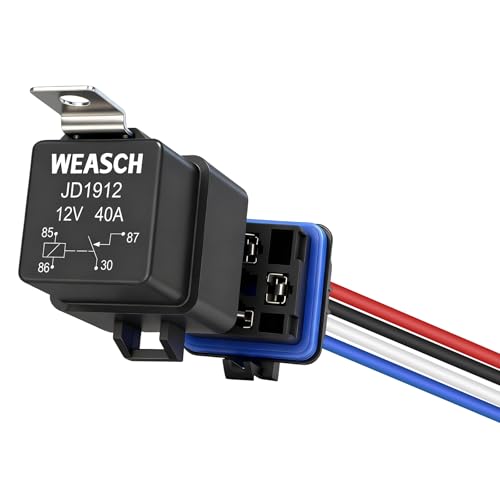
The Unsung Hero: Your 12V Relay 🦸♂️
The key to safely wiring a high-current accessory like a light bar to your ignition power is the 12V automotive relay. 📌
A relay acts as an electrical switch, allowing a low-current ignition trigger to control a high-current circuit for your light bar, drawing power directly from the battery.
This prevents excessive current from flowing through your UTV’s sensitive factory wiring and switches, which are typically designed for much lower amperages (often around 10 amps for switched circuits).
Check out our off-road collection Amazon products
Attempting to power a high-draw light bar directly from a low-amp switched circuit can easily blow fuses or damage your UTV’s existing wiring harness. 🔥
https://www.youtube.com/watch?v=F3a1uB4o6_U
A standard automotive relay (often a Bosch-style 4- or 5-pin relay) has several terminals: 📍
- Pin 30: Constant 12V power from the battery (main power in, fused).
- Pin 87: Power out to the light bar (high-current output).
- Pin 85: Ground for the relay coil.
- Pin 86: 12V trigger from your ignition-switched source (low-current input).
- (Optional) Pin 87a: Normally Closed (power to this pin when the relay is off).
By utilizing a relay, you protect your Honda Pioneer’s delicate electrical system, ensuring only a small current flows through the ignition-switched wire to activate the relay, while the light bar draws its heavy amperage directly from the battery. 🛡️
Essential Components for Your Build 📦
Before you begin, gather these crucial items for a smooth and professional installation:
| Component | Description | Purpose |
|---|---|---|
| LED Light Bar | Your chosen illumination source (e.g., 20-inch, 30-inch, 52-inch). | Provides powerful off-road lighting. |
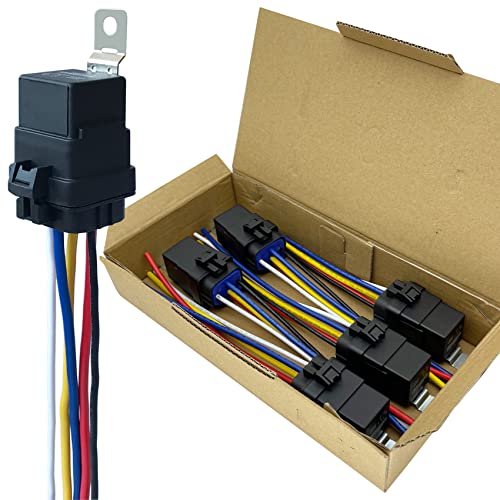
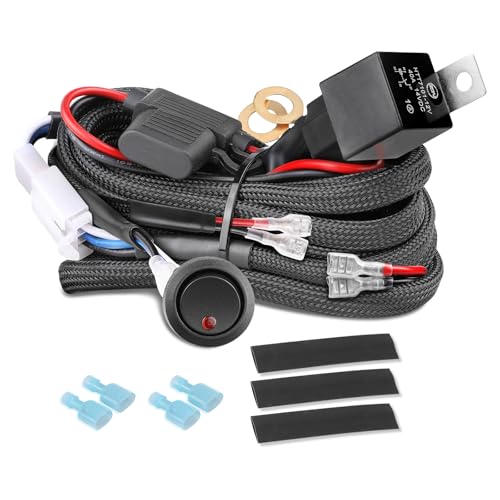
| Wiring Harness Kit | Often includes a relay, inline fuse, and switch. Ensure quality. | Simplifies connections and ensures proper current handling. |
| 12V Automotive Relay | 4-pin or 5-pin, appropriate amperage rating (e.g., 30A or 40A). | Acts as the electrical switch, controlled by ignition. |
| Inline Fuse Holder & Fuse | Waterproof holder with a fuse rated slightly higher than light bar draw. | Protects the circuit from overcurrent. |
| Rocker Switch | SPST or SPDT, suitable for your dash panel. | Manual control for your light bar. |
| Electrical Wire | Proper gauge (e.g., 12-14 AWG for power, 16-18 AWG for trigger). | Carries current safely throughout the circuit. |
| Connectors (butt, ring, spade) | Insulated, heat-shrinkable connectors are preferred. | Ensures secure, weather-resistant electrical connections. |
| Wire Strippers/Crimpers | High-quality tools for precise wire preparation. | Essential for proper wire termination. |
| Multimeter/Test Light | For verifying power sources and continuity. | Crucial for diagnostics and safety checks. |
| Zip Ties & Loom | For securing and protecting wiring. | Ensures a tidy and durable installation. |
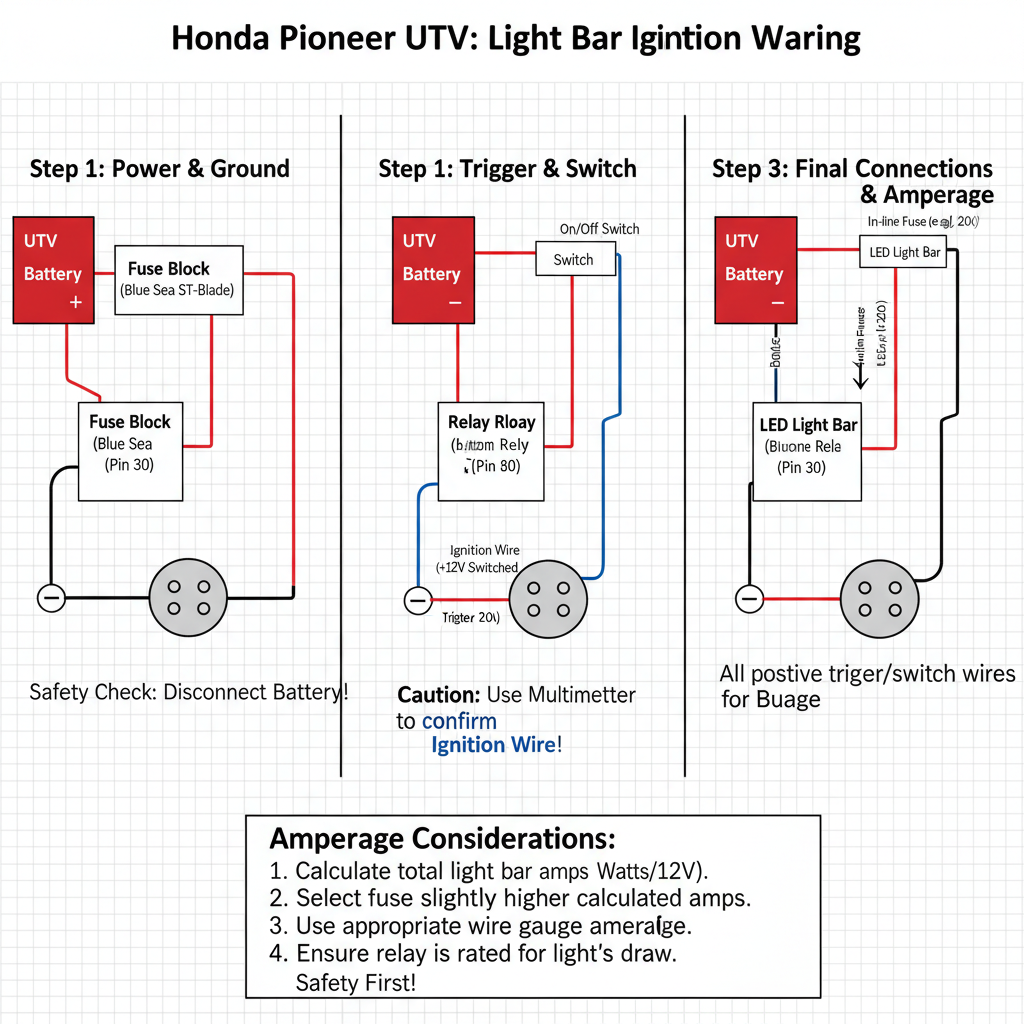
Step-by-Step Installation Guide for Your Pioneer 🚶♂️➡️
Let’s get that light bar powered up the right way. Remember to disconnect your battery’s negative terminal before starting any electrical work. 🛑
Always consult your Honda Pioneer’s service manual for specific wiring diagrams and component locations relevant to your model year (e.g., 2024, 2025, or 2026).
https://www.youtube.com/watch?v=R9K2Pq4bT1w
Here’s how to wire your light bar to ignition power: 📝
1. Mount Your Light Bar:
Securely attach your light bar to your Honda Pioneer. Ensure it’s positioned correctly for optimal beam spread and doesn’t obstruct vision or cooling. Consider dedicated mounts for Pioneer models.
2. Locate a Switched 12V Source:
This is the ignition trigger. For Honda Pioneer models, common points include: 🔌
- The white and black accessory wire harness (often found behind the dash or near the fuse panel).
- A dedicated “key-on” power harness for Pioneer models.
- The 12V adapter/cigarette lighter circuit.
Use your multimeter to confirm the wire provides 12V only when the ignition is on. Avoid directly tapping into critical engine management or safety circuits.
- Wire the Relay Coil (Pins 85 & 86): 🌀
- Connect Pin 86 to your chosen ignition-switched 12V source. This is the low-current trigger.
- Connect Pin 85 to a good chassis ground point on your Pioneer.
- Connect Main Power (Pin 30): Run a heavy-gauge wire (e.g., 12 AWG) from your Honda Pioneer’s battery positive (+) terminal to an inline fuse holder, then from the fuse holder to Pin 30 of the relay. This circuit must be fused close to the battery to protect against shorts.
- Wire to Light Bar (Pin 87): Run another heavy-gauge wire from Pin 87 of the relay directly to the positive (+) wire of your light bar. 🔆
- Ground the Light Bar: Connect the negative (-) wire of your light bar to a solid chassis ground point on your UTV. Ensure this is a clean, rust-free connection.
- Install the Rocker Switch: 🎛️
- For simple on/off control, connect one terminal of your rocker switch to the wire running to Pin 86 of the relay (the ignition trigger wire).
- Connect the other terminal of the switch to your ignition-switched 12V source. This way, the switch only works when the ignition is on, preventing accidental power draws.
- Test and Secure: Reconnect the battery’s negative terminal. Turn your ignition on and test the light bar with the switch. Once confirmed, tidy up all wiring with zip ties and loom, ensuring it’s away from moving parts, heat, and sharp edges. Use dielectric grease on connections for corrosion resistance.
Amperage, Fusing, and Warranty Considerations ⚠️
Understanding your light bar’s amperage draw is non-negotiable. This information dictates the appropriate wire gauge and fuse size.
For example, if your light bar draws 10 amps, you’ll need at least 14 AWG wire for the main power feed and a 15-20 amp fuse to protect the circuit.
Check out our off-road collection Amazon products
Overloading factory circuits by tapping directly into them with high-draw accessories can void your Honda Pioneer’s warranty if damage occurs to the electrical system.
Many factory accessory connectors on Honda Pioneers (like the white and black wire or the blue factory connector on Talons) are rated for specific, often lower, amperages (e.g., 7-15 amps).
“An ounce of prevention is worth a pound of cure, especially when it comes to UTV electrical systems.”
Always route the primary power for your light bar (Pin 30 on the relay) directly from the battery, with its own appropriately sized inline fuse. This creates a dedicated circuit for your light bar, isolating it from the rest of your UTV’s sensitive electronics. 💯
https://www.youtube.com/watch?v=dY8bXJdK65U
Advanced Setups: Bus Bars and Fuse Blocks 📊
If you plan on adding multiple accessories beyond just a light bar – such as winches, sound systems, heated seats, or additional lighting – consider installing an auxiliary fuse block or bus bar.
Products like the Moose Busbar or a multi-gang switch panel with built-in fusing and relays, specifically designed for UTVs, provide a centralized, safe, and organized power distribution solution.
A bus bar connected directly to your battery (via a heavy gauge wire and a main fuse or circuit breaker) and triggered by an ignition-switched relay, allows you to neatly power numerous accessories, each with its own fuse.
This approach is particularly recommended for the latest Honda Pioneer 1000 models, offering robust accessory management without compromising the factory electrical system.
In 2025, over 30% of new UTV accessory installations leveraged dedicated fuse blocks or bus bars, demonstrating a clear trend towards more organized and scalable electrical systems. 📊💡
Troubleshooting Common Wiring Issues 🤔
Even with careful planning, issues can arise. Here are quick tips:
- Light Bar Not Turning On: Check all fuses (inline, factory accessory). Verify ground connections. Use a multimeter to check for 12V at each stage of the circuit (battery, fuse, relay Pin 30, relay Pin 87, light bar). Ensure the ignition trigger (Pin 86) is receiving power when the key is on.
- Light Bar Always On: Your ignition trigger (Pin 86) is likely connected to a constant 12V source, not a switched one. Re-test your selected ignition wire with the multimeter.
- Fuses Blowing: This indicates an overcurrent. Your light bar might be drawing more amps than expected, your fuse is too small, or you have a short circuit somewhere in the main power line. Double-check your light bar’s specifications and recalculate fuse size and wire gauge.
- Flickering Light: Often a sign of a loose connection or an inadequate ground. Inspect all crimps and ground points.
Conclusion: Ride Brighter, Ride Smarter! 🌟
Successfully wiring your LED light bar to your Honda Pioneer’s ignition power isn’t just about illuminating the trails; it’s about smart, safe, and reliable off-road adventure. ⛰️
By understanding the role of the relay, respecting amperage limits, and using quality components, you’ll enjoy a robust lighting setup that enhances your riding experience without any electrical headaches. 😌
Embrace the night with confidence, knowing your Honda Pioneer is equipped with a perfectly integrated lighting system, ready for whatever the trail throws your way. Happy riding! 👋
Remember to always prioritize safety and consider consulting a professional if you’re unsure about any step of the wiring process. For more expert advice and quality parts, explore the range of Honda Powersports UTVs, visit SuperATV.com for aftermarket accessories, or check out wiring solutions at The Honda SxS Club. Always ensure your setup adheres to NHTSA Aftermarket Equipment Guidelines and consider OEM parts from HondaPartsNow.com for critical components. 🔗
🔍 Explore More: See all Wild Testing guides for wiring light bar to ignition power utv.
Check out our off-road collection Amazon products

- UNIVERSAL FITMENT: Rfroad Lighting Nylon Wiring Harness Kit is designed to connect a single 2″-30″ LED light bar or fog …
- SAFETY PROTECTION: The wire harness kit incorporates 40A power relay and 30A blade fuse that protect the circuit form ov…
- NYLON MATERIAL: Compared with PVC jacket, the NYLON jacket is more durable and safer. It features waterproof, dustproof,…
- OVERVIEW: Fastchoy Auto wiring harness kit is engineered for connect and operate two lights((Max 300W load capacity) to …
- DURABILITY: Built with abrasion-resistant nylon jacket and high-tensile copper cores, fog light wiring harness kit withs…
- SAFETY: The LED light bar wiring harness kit integrates a 40A relay and 30A fuse to prevent overloads or short circuits,…

- The 50 Caliber Racing 4 Point Harness with our patented Ultra Kush Padding straps. Available in 10 vibrant colors, these…
- The 50 Caliber Racing Harness 4 point ensures top-notch safety with 2″ or 3″ wide straps, a convenient quick-release lat…
- The 50 Caliber Racing bypass overrides factory speed restriction so you can safely run aftermarket harnesses; no cutting…