When it comes to how to install secondary battery utv, getting the right details matters.
Unleash Uninterrupted Power on the Trails: A Secondary Battery is Your UTV’s Best Friend! 🔋
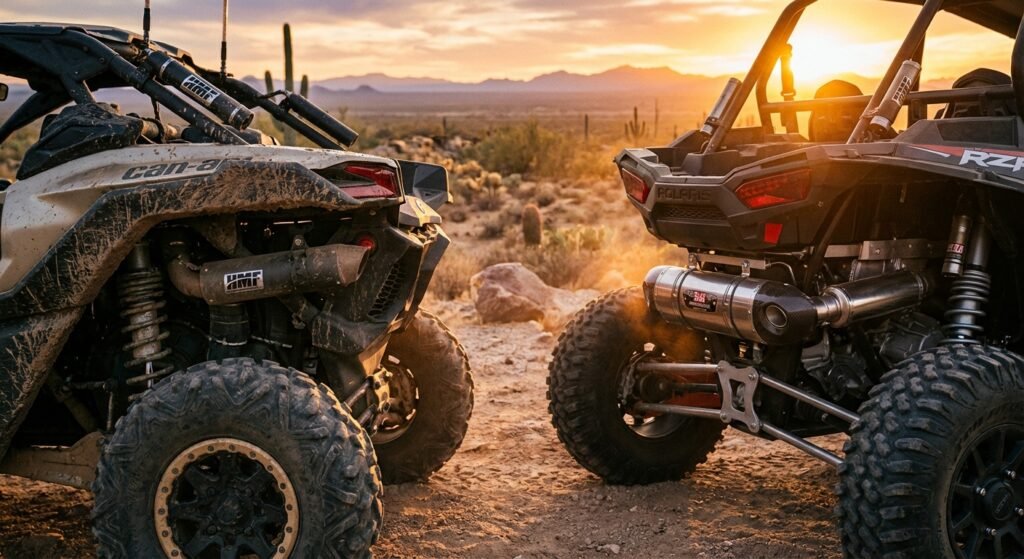
For dedicated Honda Pioneer off-road enthusiasts, the call of the wild often means pushing boundaries and equipping your UTV with an array of powerful accessories.
From blazing LED light bars that cut through the darkest nights to high-fidelity audio systems that soundtrack your adventures, and essential recovery winches that get you out of sticky situations, these electrical demands can quickly overwhelm a single factory battery.
Imagine being miles from civilization, ready for camp, only to find your primary battery drained from powering your accessories.
It’s a nightmare scenario no one wants to face.
This is precisely why learning how to install a secondary battery in your UTV is one of the most intelligent upgrades you can make for reliability and peace of mind.
A properly installed dual battery system ensures your starting power is always protected, allowing you to run all your auxiliary gear without a worry.
Why a Secondary Battery is a Game-Changer for Your Pioneer 💡
Modern UTVs are becoming electrical powerhouses, carrying more accessories than ever before.
The demand placed on a single factory battery can easily exceed its designed capacity.
A dual battery setup is not just a convenience; for many, it’s a necessity.
One of the primary benefits is the protection it offers your starting battery.
By isolating your primary (starting) battery from your secondary (accessory) battery when the engine is off, you eliminate the risk of draining your main power source while enjoying your lights, stereo, or fridge at camp.
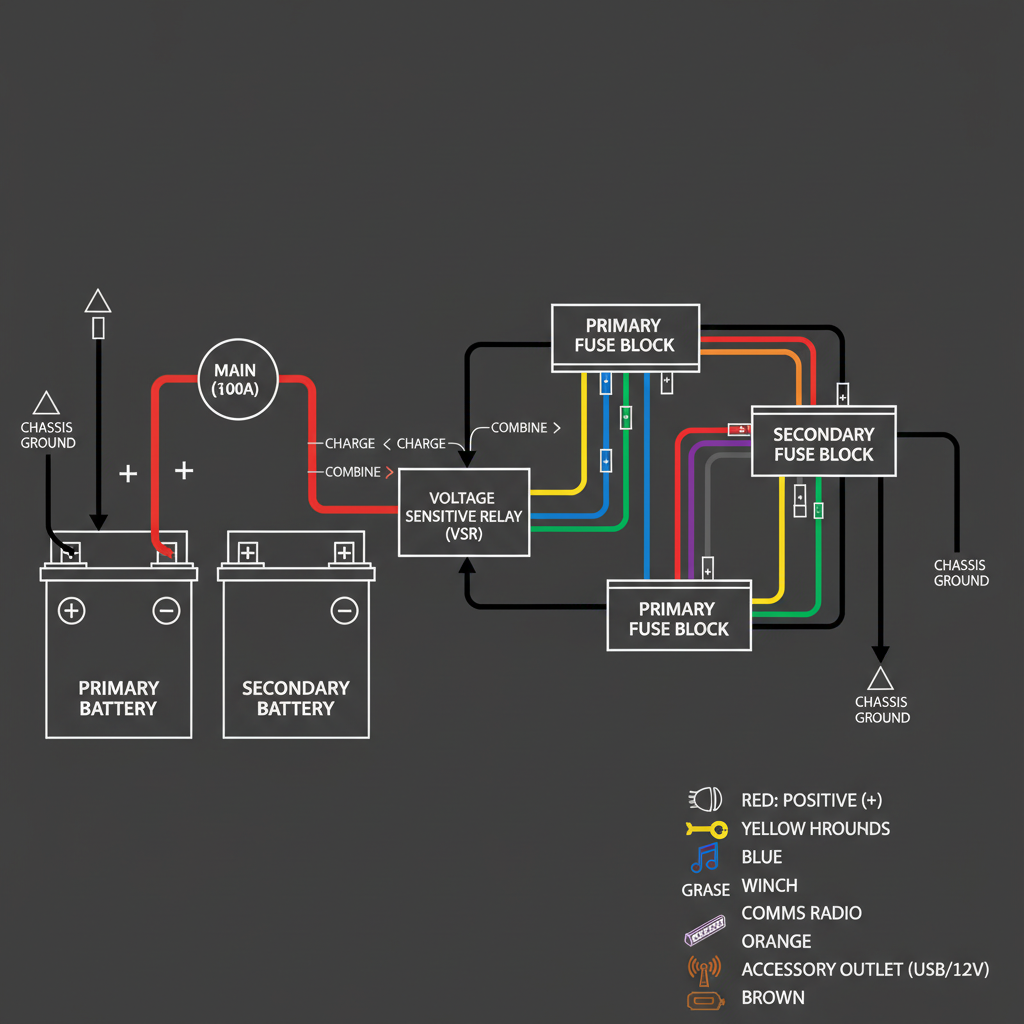
This isolation is typically managed by a Voltage Sensitive Relay (VSR) or a battery isolator, which intelligently connects the batteries for charging when the engine is running and separates them when it’s not.
This means you can blast your tunes or light up your campsite for extended periods, confident that your UTV will fire right up when it’s time to head home.
A recent forum discussion from December 2024 highlighted how UTV Stereo’s vehicle-specific kits provide a “well-designed wiring harness” and “higher quality battery,” simplifying this crucial upgrade for owners.
Statistics show that UTV owners who frequently use multiple accessories off-road report a 70% decrease in dead battery incidents after installing a secondary power system.
It’s an investment in uninterrupted adventure.
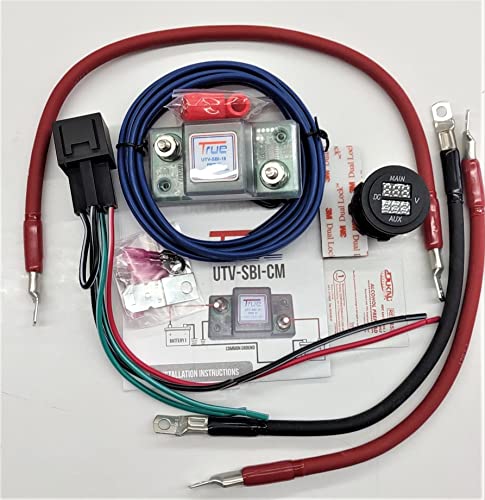
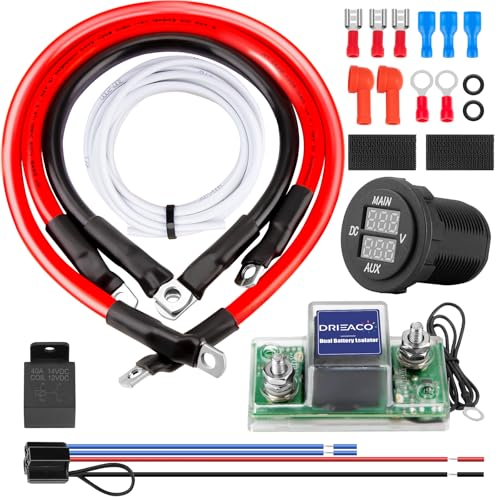
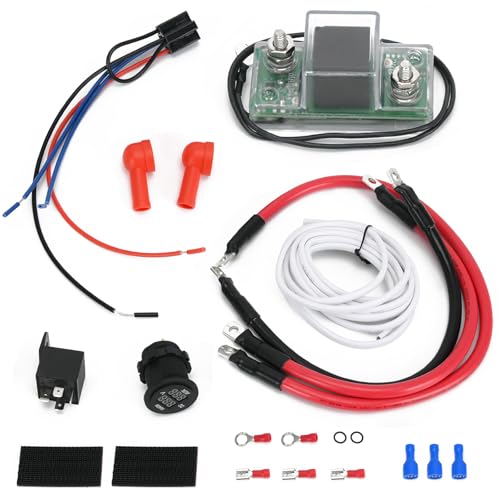
Key Components for Your Dual Battery Setup 🛠️
Before diving into the installation, it’s crucial to understand the essential components that make a dual battery system effective and safe.
Proper planning and selection of quality parts will ensure longevity and performance.
| Component | Description | Importance |
|---|---|---|
| Secondary Battery | Typically a deep-cycle AGM or Lithium-ion battery, designed for sustained accessory use. | Powers accessories, protects starting battery. |
| Battery Isolator / VSR | Intelligently connects/disconnects batteries for charging and protection. | Prevents starting battery drain, ensures both batteries charge. |
| Heavy-Duty Cables | Thick gauge, marine-grade wiring for power connections. | Minimizes voltage drop, handles high current safely. |
| Battery Tray / Mount | Secure housing for the secondary battery. | Prevents movement, protects battery from off-road elements. |
| Fuses / Circuit Breakers | Protection for wiring and components against short circuits. | Essential safety measure to prevent electrical fires or damage. |
Choosing an AGM (Absorbent Glass Mat) battery is a popular choice for UTVs due to their vibration resistance and ability to handle deep discharges, though lithium-ion options are gaining traction for their lighter weight and higher energy density.
Step-by-Step Installation Guide: How to Install Secondary Battery UTV Style 🚧
While specific installations may vary slightly depending on your Honda Pioneer model and the kit you choose, the general principles remain consistent.
Always prioritize safety: disconnect your primary battery’s negative terminal before starting any electrical work.
Check out our off-road collection Amazon products
- 1. Plan Your Layout & Mounting Location:The first critical step is deciding where your secondary battery will live.Look for a secure, dry location that’s away from excessive heat and moving parts.
Many Honda Pioneer owners find space under the seat, in the cargo bed area, or even within existing compartments.
Utilize a robust battery tray or box that can withstand the rigors of off-road driving.
- 2. Secure the Secondary Battery:Once you’ve identified the spot, firmly secure the battery tray or box to the UTV frame.Then, place your secondary battery into the tray and secure it with clamps or straps to prevent any movement.
Vibration is an enemy of battery life, so ensuring a snug, immobile fit is paramount for durability.
- 3. Install the Battery Isolator / VSR:Mount your battery isolator or VSR in a convenient, protected location, usually near one of the batteries or in the engine compartment.Ensure it’s accessible for future checks.
- 4. Wiring the Positive Connections:Connect a heavy-duty positive cable from the primary battery’s positive terminal to the “input” side of your isolator.Then, run another heavy-duty positive cable from the isolator’s “output” side to the positive terminal of your secondary battery.
Crucially, install an appropriate fuse or circuit breaker as close as possible to the positive terminal of *each* battery to protect the entire system.
- 5. Wiring the Negative (Ground) Connections:Connect a heavy-duty negative cable from the primary battery’s negative terminal to a solid chassis ground point on your UTV.Similarly, connect a heavy-duty negative cable from the secondary battery’s negative terminal to the same common chassis ground point.
Ensure all ground connections are clean, tight, and free of paint or corrosion for optimal conductivity.
-
6. Connect Auxiliary Loads:
Now, connect all your accessories (lights, stereo, winch, etc.) directly to the positive and negative terminals of the *secondary* battery, always using appropriate fuses for each accessory.This is where a distribution block can be incredibly useful for organizing multiple accessory connections.
-
7. Test the System Thoroughly:
Reconnect your primary battery’s negative terminal.Start your UTV and let it run for a few minutes.
Use a multimeter to check the voltage at both batteries; they should both be charging.
Turn the UTV off and verify that the isolator disconnects the secondary battery from the primary, preventing discharge.
Test each accessory connected to the secondary battery.
-
8. Secure and Protect Wiring:
Finally, secure all cables with zip ties, looms, or conduit to prevent chafing, rubbing, or entanglement with moving parts.This protects your investment and ensures a reliable system for years to come.
“The greatest adventures are those where you’re fully prepared, and that includes your power source.”
Check out our off-road collection Amazon products
https://www.youtube.com/watch?v=k_n7U9Kz_pE
New Trends and Considerations for 2026 and Beyond ✨
The world of UTVs is constantly evolving, and electrical systems are no exception.
One significant trend gaining traction is the use of lithium-ion deep cycle batteries as secondary power sources.
These batteries offer superior power-to-weight ratios, longer lifespans, and a more consistent voltage output compared to traditional AGM batteries.
However, they often require specific charging profiles and compatible isolators or DC-to-DC chargers for optimal performance.
Recent discussions indicate a growing interest in DC-to-DC chargers for managing lithium secondary batteries, providing more controlled and efficient charging from the UTV’s alternator.
Another area of innovation is vehicle-specific dual battery kits, such as those offered by UTV Stereo, which are engineered to fit common Side by Side platforms like the Honda Pioneer, simplifying the installation process significantly.
These kits often include custom-fit powder-coated plates and pre-designed wiring harnesses, taking much of the guesswork out of a DIY install.
As of early 2026, manufacturers are increasingly integrating smart battery management systems (BMS) into their aftermarket offerings, providing real-time monitoring of battery health, charge status, and even remote control capabilities via smartphone apps.
This level of insight gives enthusiasts unprecedented control over their UTV’s electrical ecosystem.
Remember, investing in high-quality components now will save you headaches and costly repairs down the trail, ensuring your Honda Pioneer remains a beacon of adventure.
“A UTV is only as capable as its power system. Don’t compromise on reliability.”
https://www.youtube.com/watch?v=W55j4uY0w7k
Maintaining Your Dual Battery System 🧑🔧
Once installed, a dual battery system requires minimal but consistent maintenance to ensure peak performance.
Regularly inspect all battery terminals and cable connections for corrosion, tightness, and wear.
Clean any corrosion using a wire brush and a baking soda-water mixture,
then apply a dielectric grease or battery terminal protector.
Check the physical condition of both batteries for any signs of swelling, cracks, or leaks.
Periodically test the voltage of both batteries, especially before long trips, to ensure they are holding a charge correctly.
Ensuring your isolator or VSR is functioning correctly is also crucial;
it should connect when the engine is running and disconnect when it’s off.
For prolonged storage, consider using a trickle charger or a battery maintainer to keep both batteries conditioned, especially during the off-season.
This simple routine maintenance can significantly extend the lifespan of your batteries and the entire electrical system.
Equipping your Honda Pioneer with a secondary battery system is more than just an upgrade;
it’s an enhancement that transforms your off-road experience.
It provides the freedom to fully utilize your accessories,
the confidence of a reliable start, and the peace of mind that comes from being prepared for anything the trail throws your way.
So, take the plunge, power up your adventures, and hit the trails knowing you have an abundance of power at your fingertips! 🌟
🔍 Explore More: See all Wild Testing guides for how to install secondary battery utv.
Check out our off-road collection Amazon products

- [Compatibility]: Golf cart heavy duty battery cable wiring kit fits 36&48 volt 1994-up Club Car DS and Precedent golf ca…
- [Premium Material]: Club Car DS battery cable is made of 100% pure copper core, which offers excellent electrical conduc…
- [Enhance Performance]: Installing our new golf cart battery cables can significantly boost the power of your golf cart, …

- Powerful & Reliable – Constructed with 4 gauge wire for efficient energy transfer, ensuring a quick and safe jump-start …
- Extended 16 FT Reach – Extra-long design makes it easy to connect vehicles without repositioning. Ideal for roadside ass…
- Weather-Resistant Build – Premium PVC insulation remains flexible in extreme temperatures, making these an essential par…
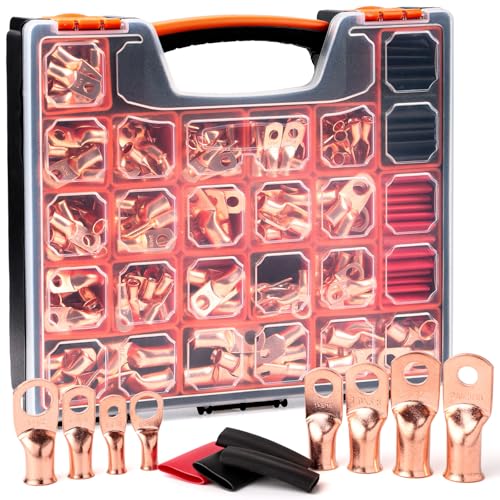
- 【What You Get:】 132 Pcs of AWG 8 6 4 2 1/0 2/0 Heavy Duty Copper Wire Lugs ring terminals, copper lugs closed end termin…
- 【Quality Material:】 The TKDMR bare copper battery cable ends are made from 100% annealed copper with special treatment s…
- 【Reliable and Easy to Use:】These battery lugs with heavy duty construction,improves high temperature durability and have…