Hey fellow off-road enthusiasts! Have you ever been out on a thrilling trail in your electric UTV, only to find yourself constantly glancing at the battery indicator, dreading the moment your adventure comes to an abrupt halt?
I know the feeling, and it’s not fun. Electric UTVs are incredible machines, offering quiet operation, instant torque, and an eco-friendly way to explore the great outdoors.
However, their biggest limitation often comes down to range anxiety.
But what if I told you there’s a way to push those boundaries further?
Imagine tackling longer trails, reaching more remote campsites, and enjoying extended hours of silent exploration without a care in the world.
That’s where a DIY electric UTV range extender comes into play.
It’s a game-changer for anyone looking to maximize their electric UTV’s potential.
In this comprehensive guide, we’re going to dive deep into how you can build your own range extender, transforming your UTV into an unstoppable off-road beast. Let’s get started on with it!

Videos are added as random thoughts 💭 💭 💭
What Exactly is an Electric UTV Range Extender?
Before we get our hands dirty with the DIY aspect, let’s clarify what an electric UTV range extender is.
In essence, a range extender is an auxiliary power unit (APU) designed to supplement your electric UTV’s primary battery pack, effectively extending its operational range.
Think of it as a portable power station that kicks in when your main battery starts running low, providing additional electricity to keep you going.
Unlike a traditional hybrid vehicle where a combustion engine directly drives the wheels, a range extender in an electric UTV typically operates as a serial hybrid system.
This means a small internal combustion engine (often a compact gasoline generator) is used solely to generate electricity.
This electricity then charges your UTV’s battery or directly powers the electric motors, allowing you to continue your journey without needing to find a charging station.
It’s a clever solution that offers the best of both worlds: the quiet, clean power of an electric motor for most of your ride, with the peace of mind that comes from having a backup power source for those longer excursions.
This system is particularly beneficial for UTVs, which often operate in remote areas far from charging infrastructure.
It mitigates range anxiety, allowing riders to explore further and stay out longer, making the electric UTV a more versatile and practical option for extended off-road adventures.
The beauty of a DIY approach is that you can customize the size and type of your range extender to perfectly match your UTV’s needs and your typical usage patterns.
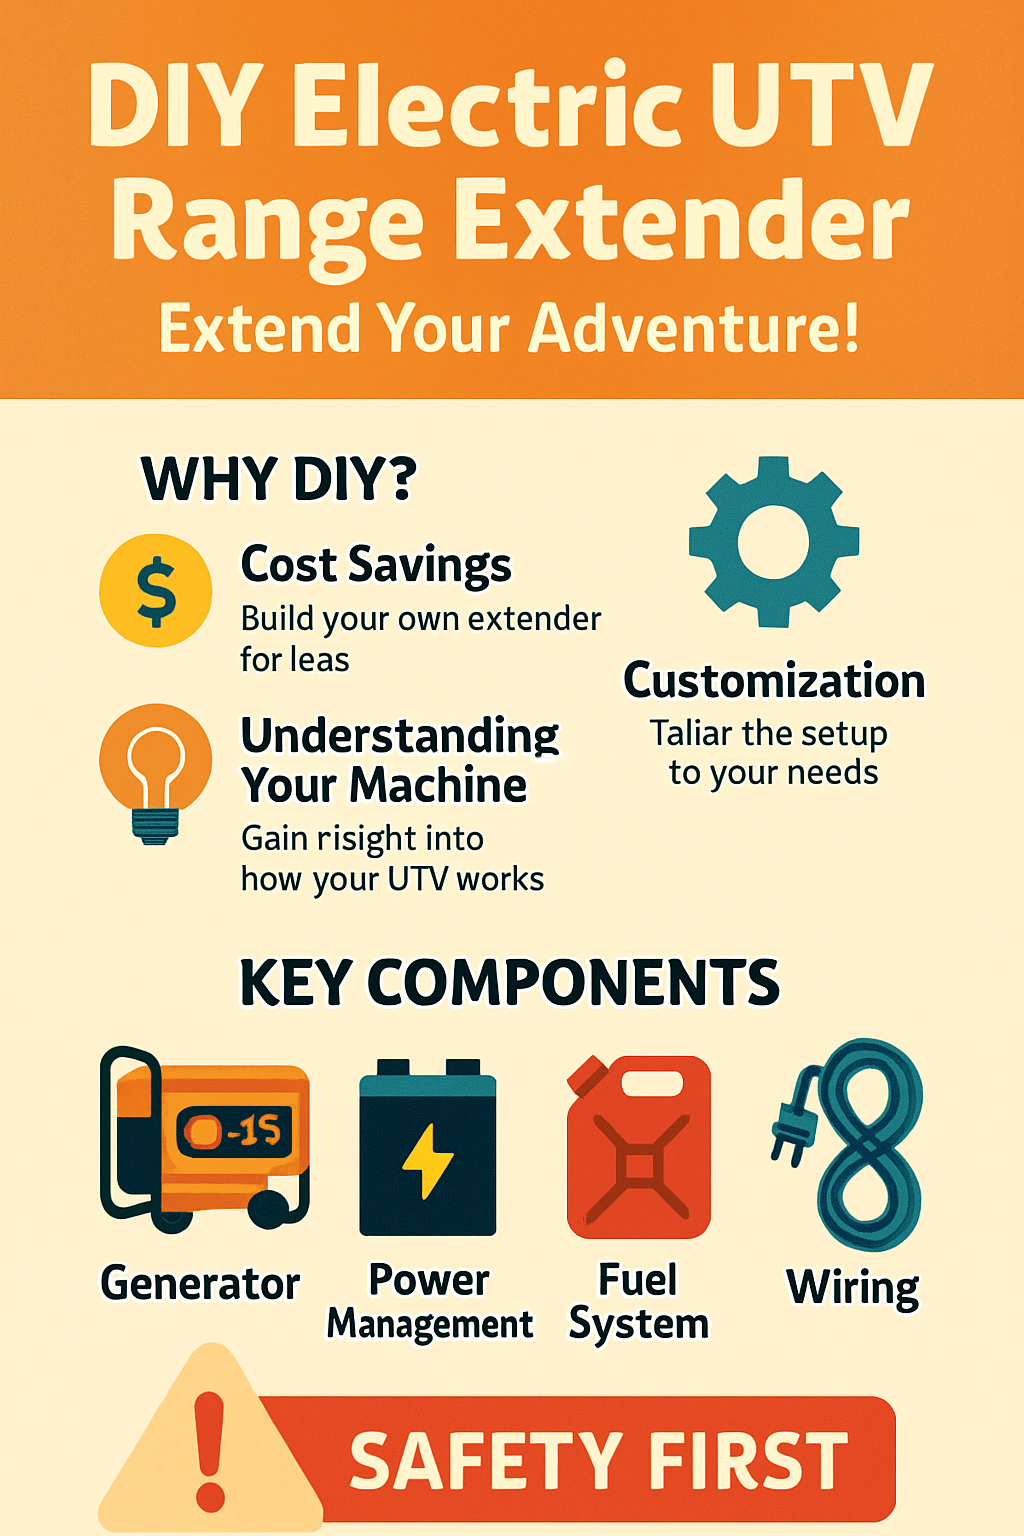
Why Go DIY for Your Range Extender?
You might be wondering why you should bother building a range extender yourself when there are commercial options available.
Well, let me tell you, the DIY route offers a host of compelling advantages that can significantly enhance your off-road experience and even save you some serious cash.
First and foremost, cost savings are a huge motivator.
Off-the-shelf range extenders, especially those designed for specific UTV models, can be quite expensive.
By sourcing components yourself and putting in the effort, you can often build a comparable system for a fraction of the price.
This means more money left over for other UTV upgrades or, better yet, more adventures!
Next up is customization.
Every electric UTV owner has unique needs and preferences.
A DIY range extender allows you to tailor the system precisely to your UTV’s specifications and your typical usage.
Do you need a super lightweight setup for short, fast trips, or a more robust system for multi-day expeditions?
You get to choose the generator size, fuel capacity, and battery integration that best suits your style.
This level of personalization is rarely available with pre-built units.
Then there’s the invaluable benefit of understanding your machine.
When you build something yourself, you gain an intimate knowledge of how it works.
This understanding is crucial for troubleshooting, maintenance, and making future modifications.
Imagine being deep in the wilderness and knowing exactly how to diagnose and fix a minor issue with your range extender – that’s peace of mind you can’t buy.
Finally, there’s the sheer satisfaction of accomplishment.
There’s nothing quite like the pride that comes from successfully completing a complex project and seeing it perform exactly as you envisioned.
Every time you extend your ride thanks to your own handiwork, you’ll feel a sense of achievement that makes the effort all worthwhile.
It’s not just about extending your range; it’s about extending your capabilities and your connection to your machine.
Essential Components for Your DIY Electric UTV Range Extender
Alright, let’s talk hardware! Building a DIY range extender involves several key components, each playing a crucial role in converting fuel into usable electricity for your UTV.
Understanding these parts is the first step towards a successful build.
Here’s a breakdown of what you’ll need:
1. The Generator (Internal Combustion Engine + Alternator)
This is the heart of your range extender.
You’ll need a small, efficient internal combustion engine coupled with an alternator to produce electricity. Here are some considerations:
Engine Size: For UTVs, you’ll want something compact and relatively lightweight.
Small gasoline engines, often found in portable generators, are ideal.
Look for engines in the 5-10 horsepower range, depending on the power output you need.
Fuel Type: Gasoline is the most common and readily available. Consider engines that are fuel-efficient to maximize your extended range.
Noise Level: Since one of the joys of an electric UTV is its quiet operation, try to find a generator that runs as quietly as possible.
Inverter generators are generally quieter and produce cleaner power, which is better for sensitive electronics.
Alternator: The alternator converts the mechanical energy from the engine into electrical energy.
You’ll need one that matches the voltage requirements of your UTV’s battery system (e.g., 48V, 72V).
This might involve modifying an existing generator or sourcing an appropriate automotive alternator and adapting it.
2. Power Management System (Charge Controller/Inverter)
This is the brain that manages the flow of electricity from your generator to your UTV’s battery.
It’s critical for safe and efficient charging.
Charge Controller: This device regulates the voltage and current coming from the generator to prevent overcharging your UTV’s battery.
It ensures that the battery receives a stable and appropriate charge, protecting its lifespan.
Look for a DC-DC charge controller if your generator outputs DC, or an AC-DC converter if it outputs AC.
Inverter (Optional but Recommended): If your generator produces AC power,
you’ll need an inverter to convert it to DC power that your UTV’s battery can use.
Many portable generators are inverter generators, which simplify this step.
3. Fuel System
Your generator needs fuel to run, so a reliable fuel system is essential.
Fuel Tank: A small, robust fuel tank is needed to supply the generator.
Consider its capacity based on your desired extended range.
Safety is paramount here; ensure the tank is securely mounted and properly vented.
Fuel Lines and Pump: You’ll need appropriate fuel lines and, potentially, a small electric fuel pump to deliver fuel from the tank to the engine, especially if the tank is not gravity-fed.
4. Wiring and Connectors
High-quality wiring is crucial for safety and efficiency.
Heavy-Gauge Wires: Use wires rated for the high currents involved in charging your UTV’s battery. Undersized wires can overheat and pose a fire risk.
Fuses and Circuit Breakers: Install appropriate fuses and circuit breakers to protect your system from overcurrents and short circuits. Safety first!
Connectors: Secure, weather-resistant connectors are vital for making reliable connections between the generator, power management system, and your UTV’s charging port.
5. Mounting and Enclosure
How you integrate the range extender into your UTV is important for both functionality and aesthetics.
Mounting Frame: A custom-fabricated frame will be needed to securely mount the generator and other components to your UTV.
Consider vibration dampening to protect the components and reduce noise.
Enclosure (Optional): An enclosure can protect the components from the elements, reduce noise, and improve the overall appearance. Ensure it has adequate ventilation to prevent overheating.
6. Monitoring System (Optional but Highly Recommended)
Knowing what your system is doing is always a good idea.
Voltmeter/Ammeter: These gauges allow you to monitor the voltage and current being produced by the generator and flowing into your battery.
This helps you ensure the system is operating correctly.
Battery Monitor: A dedicated battery monitor can give you precise information about your UTV’s battery state of charge, helping you decide when to activate your range extender.
Remember, safety and compatibility are key.
Always ensure that the voltage and current ratings of all components are compatible with your UTV’s electrical system.
If you’re unsure about any aspect, consult with an automotive electrician or an expert in EV conversions.
Step-by-Step Guide: Building Your DIY Electric UTV Range Extender
Now for the exciting part – putting it all together!
This guide provides a general overview, and specific steps may vary based on your chosen components and UTV model.
Always prioritize safety and consult professionals if you’re unsure.
Step 1: Planning and Design
Before you cut any wires or drill any holes, thorough planning is essential. This phase will save you headaches down the road.
1. Assess Your UTV’s Electrical System:
Determine your UTV’s battery voltage (e.g., 48V, 72V) and maximum charging current.
This information is crucial for selecting compatible components.
2. Choose Your Generator: Based on your power needs and budget, select a compact gasoline generator.
Inverter generators are often preferred for their clean power output and quieter operation.
Ensure its output voltage can be adapted to charge your UTV’s battery.
3. Design the Mounting System: Decide where and how you will mount the generator and associated components on your UTV.
Consider weight distribution, accessibility for maintenance, and protection from the elements. Sketch out your design.
4. Map Out Wiring: Create a wiring diagram that shows how the generator, charge controller, and your UTV’s charging port will connect. Include all fuses, circuit breakers, and switches.
Step 2: Fabricating the Mounting System
A sturdy and secure mounting system is vital for the safety and longevity of your range extender.
1. Fabricate a Frame: Using steel or aluminum, build a custom frame that securely holds your generator and other components.
This might involve welding or bolting pieces together. Ensure it can withstand off-road vibrations and impacts.
2. Install Vibration Dampeners: Mount the generator to the frame using rubber isolators or other vibration-dampening materials. This will reduce noise and protect the generator and UTV from excessive vibration.
3. Secure to UTV: Attach the fabricated frame to your UTV’s chassis.
Use existing mounting points where possible, or reinforce the chassis if necessary.
Ensure it’s positioned to allow proper airflow for the generator and easy access to controls and fuel.
Step 3: Setting Up the Fuel System
Safety is paramount when dealing with fuel.
1. Mount the Fuel Tank: Securely mount a small, robust fuel tank in a safe, well-ventilated location, away from heat sources and potential impact zones.
Ensure it’s easily accessible for refueling.
2. Run Fuel Lines: Connect the fuel tank to the generator’s engine using appropriate fuel lines. Use fuel-rated clamps and ensure all connections are tight to prevent leaks.
If using an electric fuel pump, install it according to the manufacturer’s instructions.
Step 4: Wiring the Electrical Components
This step requires careful attention to detail and electrical safety.
1. Install Charge Controller: Mount the charge controller in a protected location, close to the generator and UTV’s battery connection point.
Ensure it has adequate ventilation.
2. Connect Generator to Charge Controller:
Wire the output of your generator to the input of the charge controller.
If your generator produces AC, ensure you have an appropriate AC-DC converter or are using an inverter generator that provides DC output suitable for your charge controller.
3. Connect Charge Controller to UTV:
Wire the output of the charge controller to your UTV’s charging port or directly to the battery terminals (with appropriate fusing).
Crucially, ensure correct polarity (positive to positive, negative to negative).
Install an inline fuse or circuit breaker as close to the battery connection point as possible.
4. Add Safety Switches: Install a master kill switch for the entire range extender system, allowing you to quickly shut off power in an emergency.
5. Grounding: Ensure all electrical components and the generator frame are properly grounded to the UTV chassis.
Step 5: Testing and Calibration
Never skip this critical step!
1. Initial Checks: Double-check all connections – mechanical, fuel, and electrical. Ensure there are no loose wires, fuel leaks, or unsecured components.
2. First Start-Up: With the UTV’s main power off, start the generator. Monitor its operation. Check for any unusual noises or smells.
3. Connect to UTV (Carefully!): With the generator running stably, connect the range extender to your UTV’s charging port.
Use your voltmeter and ammeter to monitor the charging voltage and current. Ensure the charge controller is regulating the power correctly and not overcharging the battery.
4. Test Under Load: Take your UTV for a short test drive, allowing the battery to discharge slightly.
Then, activate the range extender and observe its performance.
Does it maintain a consistent charge? Is there any overheating?
5. Calibrate: Adjust charge controller settings if necessary to optimize charging for your UTV’s battery.
Step 6: Enclosure and Finishing Touches (Optional)
1. Build an Enclosure: If desired, construct an enclosure around the generator for protection and noise reduction. Ensure it has sufficient ventilation and exhaust routing.
2. Final Inspection: Perform a final, thorough inspection of your entire setup.
Ensure everything is secure, protected, and operating safely.
Add any warning labels or instructional decals as needed.
Remember, this is a complex project that involves electricity and flammable fuels.
If you’re not confident in your abilities at any point, seek assistance from qualified professionals.
Your safety and the integrity of your UTV are paramount.
Safety First: Crucial Considerations for Your DIY Build
Building a DIY electric UTV range extender is a rewarding project, but it involves working with electricity, fuel, and moving parts.
Safety should always be your top priority.
Ignoring safety precautions can lead to serious injury, damage to your UTV, or even fire.
Please read and understand these crucial safety considerations before, during, and after your build.
Electrical Safety
Disconnect Power: Always disconnect your UTV’s main battery before working on any electrical components. Treat all electrical systems as live until proven otherwise.
Proper Wiring: Use only high-quality, appropriately gauged wires for all connections.
Undersized wires can overheat, melt insulation, and cause fires. Consult wire gauge charts for the current your system will draw.
Fuses and Circuit Breakers: Install fuses or circuit breakers on all positive power lines, as close to the power source as possible.
These are your primary defense against overcurrents and short circuits. Never bypass or use incorrectly rated fuses.
Insulation and Protection: Ensure all electrical connections are properly insulated and protected from abrasion, moisture, and vibration.
Use heat shrink tubing, electrical tape, and conduit where necessary.
Correct Polarity: Double-check and triple-check all positive (+) and negative (-) connections.
Reversing polarity can severely damage batteries, charge controllers, and other electronic components.
Grounding: Properly ground your generator and all electrical components to the UTV chassis.
This helps prevent electrical shocks and ensures proper system operation.
Fuel Safety
Ventilation: Always work with fuel in a well-ventilated area. Fuel vapors are highly flammable and can accumulate in enclosed spaces.
Fire Extinguisher: Keep a suitable fire extinguisher (Class B for flammable liquids) readily accessible whenever working with fuel or operating the range extender.
Fuel Tank Placement: Mount your fuel tank securely in a location that minimizes the risk of rupture in case of an accident.
It should be away from hot engine components and exhaust.
Leak Prevention: Use fuel-rated hoses, clamps, and fittings. Inspect all fuel lines regularly for cracks, leaks, or signs of wear. Address any leaks immediately.
Refueling: Always turn off the generator and allow it to cool before refueling.
Avoid spilling fuel, and wipe up any spills immediately. Never refuel near open flames or ignition sources.
Mechanical Safety
Secure Mounting: Ensure all components, especially the generator, are securely mounted to the UTV. Loose components can become projectiles during off-road use, causing damage or injury.
Exhaust Management: Route the generator’s exhaust away from the UTV’s cabin, fuel tank, and any flammable materials.
Exhaust gases contain carbon monoxide, which is deadly.
Moving Parts: Keep hands, clothing, and hair away from moving engine parts (e.g., fan, belts) when the generator is running.
Weight Distribution: Consider the added weight of the range extender and its impact on your UTV’s handling and stability.
Distribute the weight as evenly as possible.
General Safety Practices
Read Manuals: Thoroughly read and understand the manuals for all components you are using, especially the generator and charge controller.
Personal Protective Equipment (PPE):
Always wear appropriate PPE, including safety glasses, gloves, and hearing protection, when working on your project.
Test Thoroughly: Before taking your modified UTV on an extended trip, thoroughly test the range extender in a safe, controlled environment. Monitor temperatures, voltage, and overall performance.
Professional Help: If you are ever unsure about any step of the process, or if you lack the necessary skills or tools, do not hesitate to consult with a qualified mechanic or electrician.
It’s better to ask for help than to risk injury or damage.
By adhering to these safety guidelines, you can confidently build and enjoy your DIY electric UTV range extender, extending your adventures safely and reliably.
Conclusion: Unleash Your Electric UTV’s Full Potential
There you have it, fellow adventurers! The journey to building your own DIY electric UTV range extender might seem daunting at first, but with careful planning,
the right components, and a commitment to safety, it’s an incredibly rewarding project.
You’re not just adding a piece of equipment to your UTV; you’re unlocking a new level of freedom and capabilities for your off-road explorations.
Imagine the possibilities:
longer hunting trips deep into the wilderness, extended camping excursions without worrying about finding a charging station, or simply more hours of silent, emission-free enjoyment on your favorite trails.
A DIY range extender transforms your electric UTV from a great machine with a few limitations into an unstoppable force, ready to tackle any adventure you throw its way.
Remember, the spirit of DIY is all about learning, experimenting, and customizing to fit your unique needs.
Take your time, do your research, and don’t be afraid to ask for help when you need it.
The satisfaction of powering your own extended adventures with a system you built yourself is truly unparalleled.
So, gather your tools, fire up your imagination, and get ready to extend your adventure like never before.
Happy trails!


