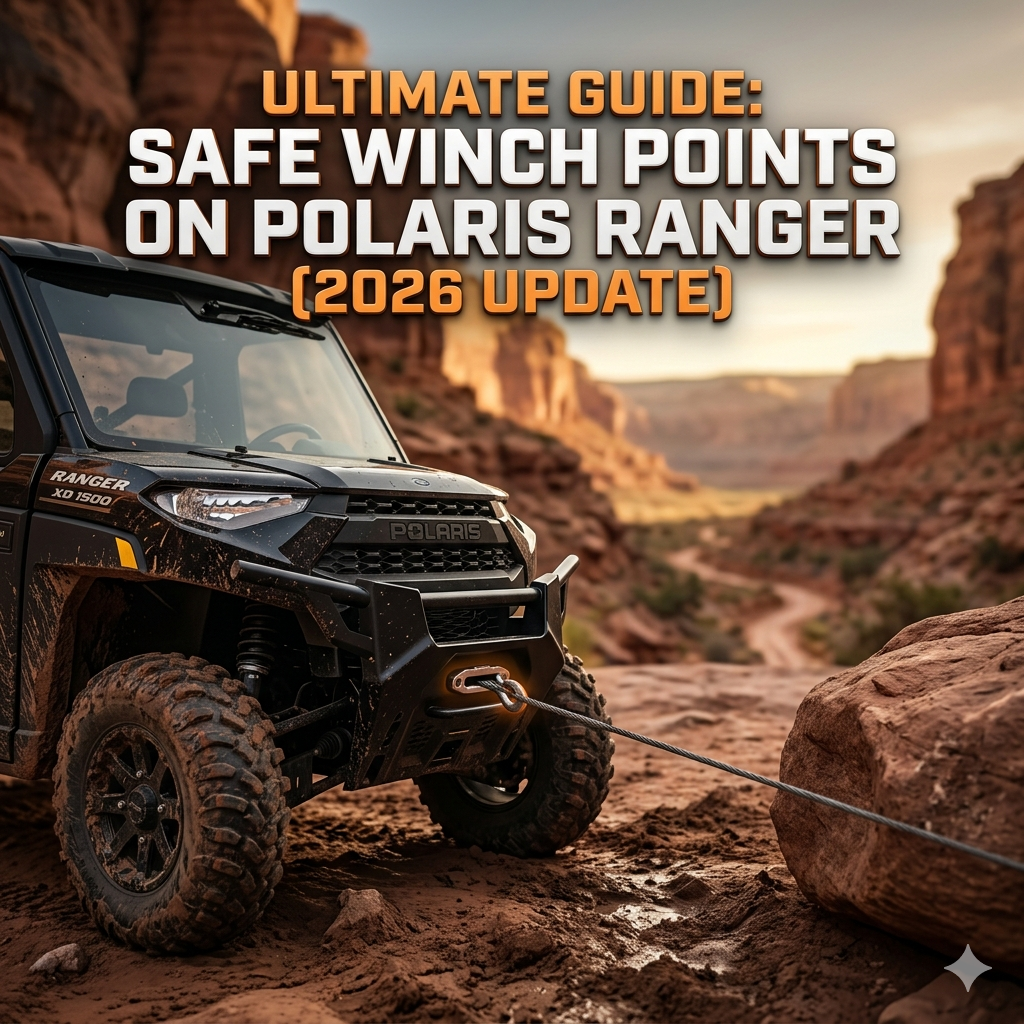


When it comes to utv cargo bed extender diy, getting the right details matters.
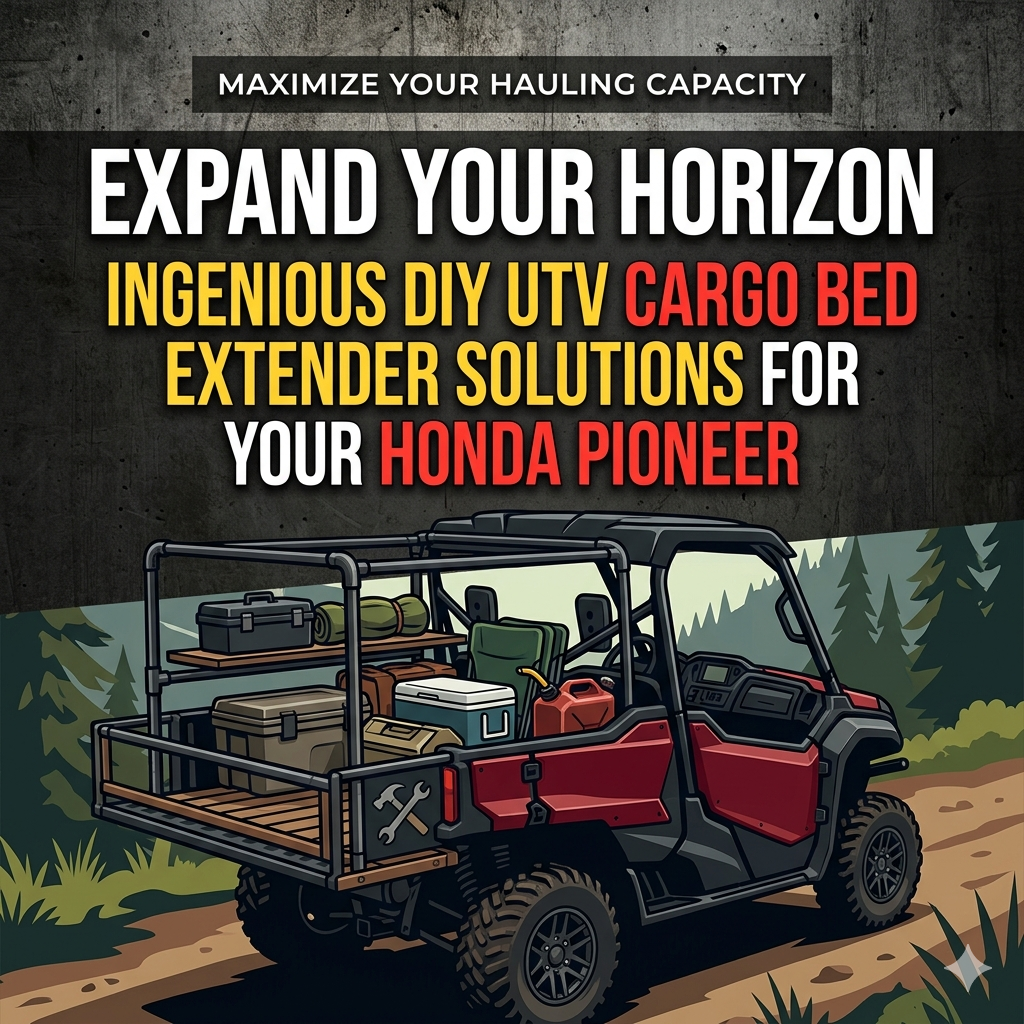
Are you tired of leaving essential gear behind on your Honda Pioneer adventures?
You’re not alone!
Every off-road enthusiast eventually faces the challenge of maximizing cargo space.
Whether it’s for a multi-day camping trip, a hunting expedition, or hauling supplies around your property, the stock UTV bed can sometimes feel limiting.
That’s where a DIY UTV cargo bed extender comes into play! 💡
Instead of spending a fortune on aftermarket parts, many ingenious Honda Pioneer owners are taking matters into their own hands, crafting custom solutions that are both functional and budget-friendly.
This comprehensive guide will dive deep into the world of DIY bed extenders, offering inspiration, practical tips, and real-time data to help you expand your Honda Pioneer’s hauling capabilities.
Get ready to unleash your inner fabricator and hit the trails with more gear than ever before!
Why a DIY UTV Cargo Bed Extender is a Game-Changer 🚀
In the dynamic world of off-roading, versatility is key.
Honda Pioneer UTVs are renowned for their rugged reliability and adaptability, but even they have their limits when it comes to bed space.
A cargo bed extender, as the name suggests, extends the usable length of your UTV’s bed, typically by supporting the tailgate when it’s down.
This simple addition can drastically increase the volume and length of items you can safely transport.
Think about those longer hunting rifles, extra fuel cans, or even an inflatable kayak – items that simply wouldn’t fit before.
The “DIY” aspect means you can tailor the extender precisely to your needs, often at a fraction of the cost of a store-bought unit.
Many enthusiasts have successfully built robust extenders for under $100, and some even for less than $20, using readily available materials and basic tools.
This level of customization ensures a perfect fit for your specific Honda Pioneer model, whether it’s a 700-4, a 1000, or a 1000-5.
Real-Time Trends and Enthusiast Insights 📈
The off-road community is constantly innovating, and the trend towards DIY solutions for UTV accessories continues to grow stronger.
Recent discussions and projects from 2024 and 2026 highlight a strong interest in cost-effective and practical modifications.
Many Honda Pioneer owners are sharing their clever designs online, showcasing everything from simple tailgate supports to elaborate multi-functional cages.
There’s a noticeable shift towards materials that offer a good balance of strength, weight, and ease of fabrication, such as aluminum tubing, sturdy plywood, and even industrial-grade plastic pipes.
For instance, a budget-conscious project from May 2026 demonstrated a fully functional tailgate extender built for less than $20 using lightweight tubing.
Another innovative DIY project shared in September 2021 detailed building a Honda Pioneer 1000-5 bed extender for around $75, utilizing materials like plywood and custom clamps.
These real-world examples prove that enhancing your UTV’s utility doesn’t require a massive investment.
Community forums are bustling with ideas for securing cargo, with many advocating for integrated tie-down points and robust netting to prevent items from shifting or falling out, especially on rough trails.
Safety remains a paramount concern, with recommendations often including proper load distribution and ensuring the extender does not obstruct taillights or license plates.
Popular DIY Approaches & Materials 🛠️
When it comes to building your own UTV cargo bed extender, several popular design philosophies and material choices emerge from the enthusiast community.
The best approach for you will depend on your budget, available tools, and the type of cargo you typically haul.
Key Insights on utv cargo bed extender diy: Metal Fabrication (Steel or Aluminum) 🔩
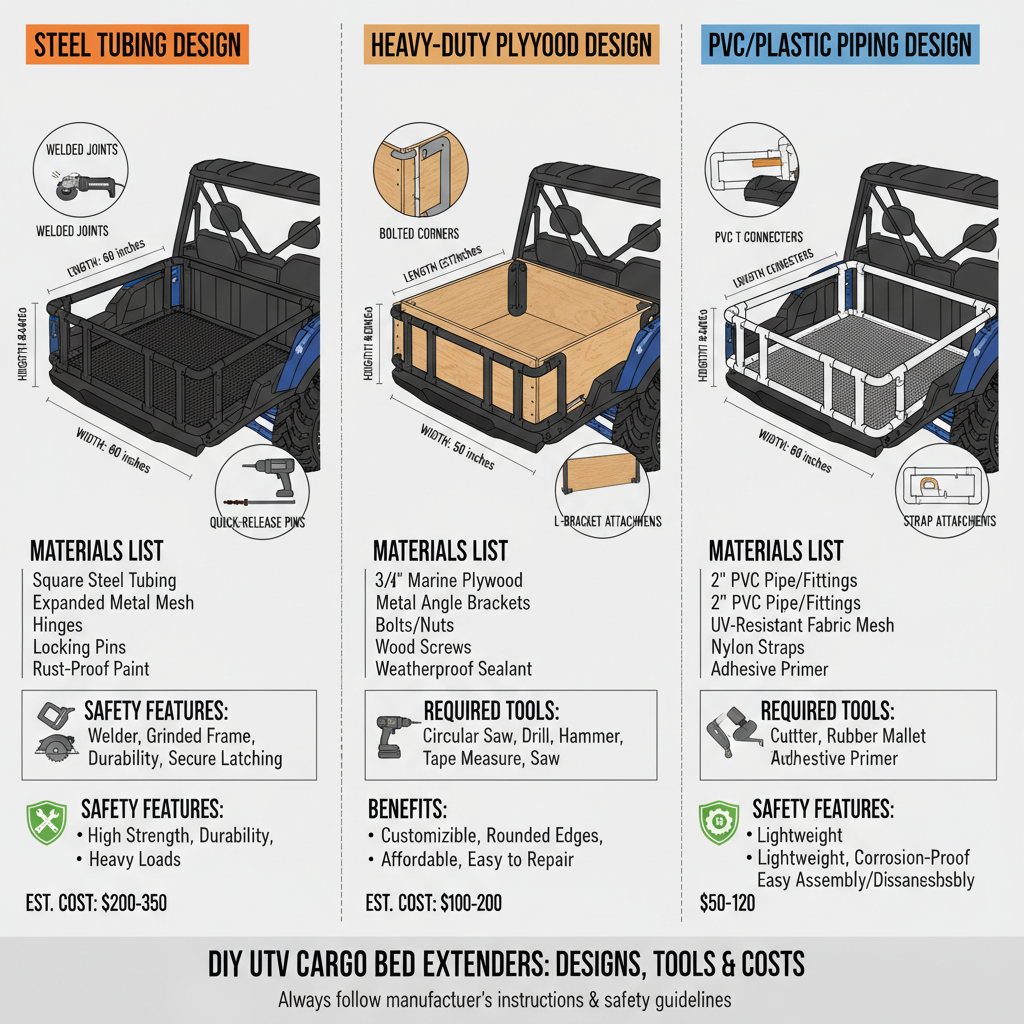
This is arguably the most durable and robust option, often seen in designs that integrate with the UTV’s existing hitch receiver or bed frame.
Materials like angle iron or square tubing are commonly used.
Check out our off-road collection Amazon products
“Measure twice, cut once” is a critical mantra here, as precision is key for a secure fit and structural integrity. [cite:Iron Horse Garage YouTube, 1]
A DIY truck bed extender project, though for a RZR, showed how to use 2-inch steel tubing and angle iron to create a removable platform that plugs into a receiver hitch, providing significant extension. [cite:Iron Horse Garage YouTube, 1]
The use of welding ensures maximum strength, but bolt-together designs are also feasible for those without welding equipment.
https://www.youtube.com/watch?v=kR2r-lJ6s8E
Consider adding D-rings or other tie-down points to your metal frame for versatile cargo securing.
For those looking to build a bed extender for a Honda Pioneer 700-4, one builder shared their process of welding aluminum tubing to create a sturdy cage that fits over the flipped-up back seats, maximizing storage when passengers aren’t present.
Plywood or Wood Composites 🪵
For a simpler, more accessible DIY project, heavy-duty plywood or marine-grade wood composites are excellent choices.
These materials are easier to cut and assemble with common woodworking tools.
A Honda Pioneer 1000-5 owner successfully built a bed extender using half-inch plywood and custom clamps to create a removable storage area when the rear seats are up.
The design typically involves a base platform that rests on the tailgate when down, with sides extending upwards to contain cargo.
“Creativity, a few basic tools, and a weekend can transform your UTV’s utility.”
Reinforcing joints with metal brackets and using exterior-grade fasteners will enhance durability.
Don’t forget to seal and paint any wood components to protect them from the elements!
PVC or Plastic Piping ♻️
An incredibly lightweight and cost-effective option, plastic piping (like black drain pipe) can be surprisingly effective for lighter loads or as a cargo divider.
One forum member shared a design for a bed extender/divider made from 1.5-inch black plastic drain pipe, costing under $100 and offering a removable, hinged solution for truck beds.
While not suitable for extremely heavy or dynamic loads, it’s perfect for groceries, smaller tools, or creating compartments.
Assembly often involves specialized PVC cement or self-tapping screws for a secure, yet flexible, structure.
This approach is particularly good for creating a “cage” effect around the extended tailgate area.
Step-by-Step Considerations for Your Build 📏
Regardless of the material you choose, a thoughtful approach will ensure a successful and safe UTV cargo bed extender.
1. Planning and Design 📝
Before cutting anything, meticulously plan your design.
Measure your Honda Pioneer’s bed dimensions, tailgate length, and consider the clearance for your specific UTV model.
Sketch out your design, noting all dimensions and connection points.
Think about how you’ll attach the extender to your UTV – will it bolt directly to the frame, slide into a hitch receiver, or simply rest on the tailgate with secure strapping?
Will it be a permanent fixture or easily removable?
For example, one “home-made” Pioneer 700-4 bed extender was designed to utilize existing D-rings for quick attachment and removal.
https://www.youtube.com/watch?v=S7-3_Qy7G3w
2. Material Sourcing 🛒
Gather all your materials.
For metal projects, local steel suppliers often have offcuts at reduced prices.
Hardware stores are your go-to for wood, plastic pipes, fasteners, and paints.
Remember, using quality materials will contribute significantly to the longevity and safety of your extender.
3. Fabrication & Assembly
🧑🏭
This is where your design comes to life.
Follow your plan, paying close attention to cuts, welds (if applicable), and fastener locations.
“Always check your measurements,” advises one builder, emphasizing squaring pieces for a perfect fit. [cite:Iron Horse Garage YouTube, 1]
For metal, beveling edges before welding can ensure stronger joints.
For wood, pre-drilling pilot holes will prevent splitting.
When working with a Honda Pioneer, consider the unique aspects of its cargo bed, especially models with convertible rear seats like the Pioneer 1000-5 or 700-4.
“Necessity is the mother of invention, and the trails demand ingenuity.”
A DIY Honda Pioneer bed extender project for the 1000-5 included custom clamps for attachment to the roll cage, demonstrating an adaptive approach to fit specific UTV designs.
Check out our off-road collection Amazon products
4. Finishing Touches & Safety 🛡️
Once assembled, sand down any sharp edges, apply protective coatings (paint for metal/wood), and install reflective tape if you plan to use it on public roads or at night.
Crucially, install sufficient tie-down points such as D-rings, eye bolts, or a UTV cargo net system.
Always test your extender with a representative load before hitting the trails.
Ensure it’s securely attached, doesn’t rattle excessively, and can handle the bumps and vibrations of off-road travel.
https://www.youtube.com/watch?v=cM35VfO4g-Y
Many custom extenders are designed to be easily removable, which is a great feature for flexibility.
Essential Tools & Materials Checklist ✅
To get started on your DIY UTV cargo bed extender, here’s a general list of tools and materials you might need, depending on your chosen design:
| Category | Tools | Materials |
|---|---|---|
| Measuring & Marking | Tape Measure, Scribe/Marker, Speed Square, Level | — |
| Cutting & Shaping | Angle Grinder, Chop Saw, Circular Saw/Jigsaw, Metal Snips (for mesh) | — |
| Joining & Fastening | Welder (with appropriate safety gear), Drill, Wrenches/Sockets, Rivet Gun, Screwdriver | Steel/Aluminum Tubing/Angle Iron, Heavy-duty Plywood, PVC Pipe, Bolts, Nuts, Washers, Self-tapping Screws, Rivets, Welding Rods/Wire, PVC Cement, Wood Glue |
| Finishing & Safety | Sandpaper/Flap Disc, Paint/Sealant, Brushes/Rollers, Reflective Tape, UTV Cargo Net, Ratchet Straps, D-rings/Eye Bolts, Safety Glasses, Gloves | Rust-inhibiting primer, Outdoor paint, UV-resistant sealant |
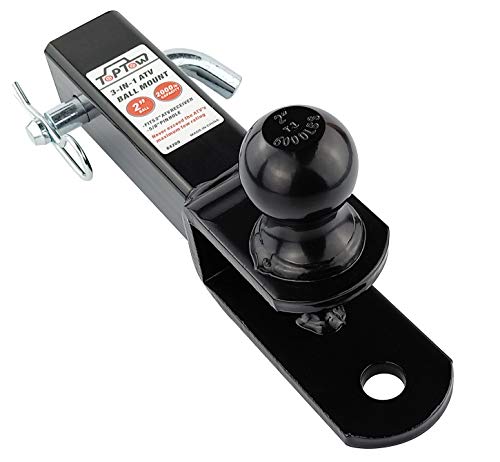
Amazon Product Suggestions for Your Build 🛒
To help you kickstart your DIY project, here are some product keywords you might find useful on Amazon for your affiliate commission:
Boosting Utility: Beyond Just Length ➕
A DIY bed extender can offer more than just extended length.
Consider these additional features to maximize your Honda Pioneer’s utility:
- Integrated Tool Holders: Add mounts for shovels, axes, or fishing rods along the sides of your extender.
- Lighting: Incorporate LED light strips for improved visibility when loading/unloading in low light conditions.
- Modular Design: Create sections that can be easily added or removed, adapting the extender for different types of loads or trips.
- Storage Compartments: If using plywood, enclosed boxes or hinged lids can offer weatherproof storage.
- Foldable Sides: Design hinged sides that can fold flat against the main extension when not in use.
The adaptability of a homemade bed extender means you’re not limited to basic functionality; you can truly craft a multi-tool for your Honda Pioneer.
Maintaining Your Custom Extender upkeep 🧼
Just like your Honda Pioneer, your DIY bed extender will benefit from regular maintenance to ensure its longevity and performance.
After each adventurous outing, take a few moments to inspect your extender for any signs of wear and tear.
Check all bolts, welds, and fasteners for tightness, as the constant vibrations and impacts of off-road driving can loosen them over time.
Reapply paint or protective coatings as needed, especially if you notice rust or degradation of wood or plastic.
Ensure that any moving parts, like hinges or removable pins, are free of dirt and corrosion, lubricating them if necessary.
Proper care will keep your custom cargo solution reliable for countless future journeys.
Hitting the Trails with Confidence 🏞️
With a well-designed and safely built DIY UTV cargo bed extender, your Honda Pioneer becomes an even more capable companion for any adventure.
From expanding your gear-hauling capacity for remote camping trips to making light work of property chores, the benefits are immense.
The satisfaction of building something with your own hands, perfectly tailored to your needs, is an added bonus.
Remember to always prioritize safety by securing your load properly with quality ratchet straps and a UTV cargo net.
Happy trails, and happy building! 🌲
Head over to the Honda Powersports official website for more accessory ideas and to keep your Pioneer running strong!
Honda Powersports Official Site
SuperATV: Aftermarket UTV Parts & Accessories
UTV Action Magazine: News & Reviews
🔍 Explore More: See all Wild Testing guides for utv cargo bed extender diy.
Check out our off-road collection Amazon products
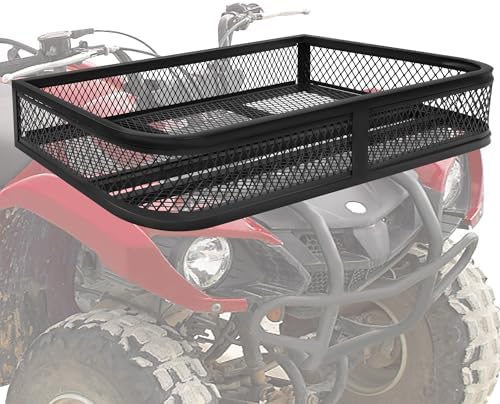
- Sturdy Constructed: Made of welded steel with a black powder-coated finish, providing strength and resistance against ru…
- Generous Storage Capacity – Measures 36″ L × 17.3″ W × 6.3″ H, giving you ample room to carry tools, camping gear, fishi…
- Protective Powder Coating – The smooth coated surface helps withstand mud, water, and harsh weather, keeping the basket …

- Increases seating capacity of your UTV
- Heavy-duty powder-coated steel frame
- Water-resistant padded seat and backrest for comfort
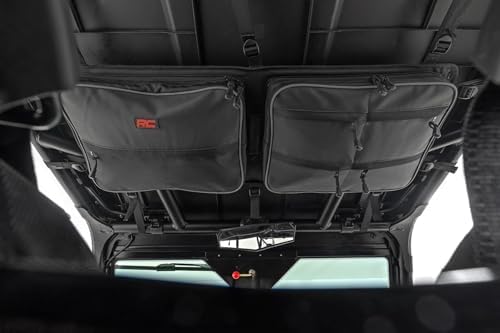
- Maximize Your Storage Space: Maximize unused roof space and keep gear organized with a roof-mounted storage bag designed…
- Built for the Trail: Constructed from premium 1680D Oxford nylon with water and mud-resistant SBS zippers, this bag resi…
- Smart, Organized Capacity: Features two large 15″ x 13″ main compartments and a split-section design with one 13″ x 6.5″…