For serious off-road enthusiasts, the pursuit of peak performance from their UTV is a never-ending quest.
While engine upgrades and suspension tuning often grab the spotlight, one of the most impactful and often overlooked modifications is a high-quality clutch kit.
The clutch system is the heart of your UTV’s power delivery, translating engine RPM into usable torque at the wheels.
A stock clutch, while adequate for general use, can often limit your UTV’s true potential, especially when tackling challenging terrains, adding larger tires, or increasing horsepower.
I’ve seen firsthand how a properly installed and tuned clutch kit can transform a UTV, providing snappier acceleration, improved back shifting, and better power management across the entire RPM range.
This comprehensive UTV clutch kit installation guide is designe to walk you through everything you need to know about upgrading your UTV’s clutch.
We’ll delve into the benefits of an aftermarket clutch kit, explore the different types available, and provide a detailed, step-by-step installation process.
Whether you’re looking to optimize for mud, sand, trails, or simply want to unlock more of your UTV’s inherent power, understanding and upgrading your clutch is a game-changer.
Get ready to unleash your UTV’s full potential and experience a ride that’s smoother, more responsive, and more exhilarating than ever before!
Why Upgrade? Benefits of a UTV Clutch Kit
Before we dive into the UTV clutch kit installation process, let’s understand why investing in an aftermarket clutch kit is a worthwhile upgrade for your UTV.
A well-designed clutch kit optimizes the power transfer from your engine to your wheels, leading to a host of performance benefits:
1. Improved Acceleration and Responsiveness
One of the most noticeable benefits of a clutch kit is enhanced acceleration.
Stock clutches are often designed for a broad range of uses, which can lead to sluggish take-offs and a feeling of being underpowered.
An aftermarket clutch kit is tuned to keep your engine in its optimal power band, resulting in quicker throttle response and snappier acceleration, especially from a dead stop or when exiting corners [1].
2. Optimized Power Delivery for Larger Tires and Accessories
Adding larger, heavier tires, lift kits, or other accessories significantly increases the rotating mass and overall weight of your UTV.
This extra load can bog down a stock clutch, leading to excessive belt slippage, increased heat, and reduced performance.
A clutch kit is specifically calibrated to compensate for these modifications, ensuring your UTV maintains its power and efficiency even with added weight [2].
3. Enhanced Back shifting and Engine Braking
Back shifting refers to how quickly your clutch downshifts when you let off the throttle or encounter resistance.
A properly tuned clutch kit improves back shifting, allowing your UTV to stay in the power band and providing more effective engine braking.
This is particularly beneficial in technical terrain, steep descents, or when navigating tight turns, offering better control and reducing reliance on your brakes.
4. Reduced Belt Slippage and Heat
Excessive belt slippage is a common issue with stock clutches, especially under heavy loads or with larger tires.
Slippage generates significant heat, which can prematurely wear out your CVT belt and even damage clutch components.
A clutch kit is designe to reduce slippage by optimizing spring rates and flyweight profiles, leading to cooler belt temperatures and extended belt life [3].
5. Increased Durability and Longevity
Many aftermarket clutch kits are built with more robust components designe to withstand the rigors of aggressive off-road riding.
By reducing belt slippage and operating at more efficient temperatures, a clutch kit can also extend the lifespan of your entire CVT system, saving you money on costly repairs in the long run.
6. Tunability for Specific Riding Conditions
Unlike stock clutches, aftermarket kits often come with adjustable components (e.g., different springs, weights, or helixes) that allow you to fine-tune your clutch for specific riding conditions, such as mud, sand, rock crawling, or high-speed desert running.
This versatility ensures your UTV is always optimized for the terrain you’re tackling.
In essence, a UTV clutch kit isn’t just about adding horsepower; it’s about making the most of the power you already have and ensuring it’s delivered efficiently and effectively to the ground.
It’s a performance upgrade that translates directly into a more enjoyable, capable, and reliable off-road experience.
[1] “A properly tuned clutch kit for your buggy or ATV keeps the engine RPMs at the ideal range throughout each gear depending on your driving style.” – Side By Side Stuff, What Does a Clutch Kit Do for a UTV or ATV? | Clutch Guide.
[2] “The best aftermarket UTV or ATV clutch kits are designed to accommodate enhanced performance by optimizing when your CVT shifts the gear ratio.” – High Lifter, What Does a Clutch Kit Do For an ATV or UTV?
[3] “A clutch kit makes sure you”re using all the available power your UTV has, and an ECU flash tune increases the available power.” – SuperATV, Will an ECU Flash Tune or Clutch Kit Give You More Power?

Types of UTV Clutch Kits: Choosing the Right One
When considering UTV clutch kit installation, it’s important to understand that not all clutch kits are created equal.
They are typically designed to optimize performance for specific UTV models, engine modifications, and riding conditions.
While the core function remains the same, variations exist in their components and tuning capabilities.
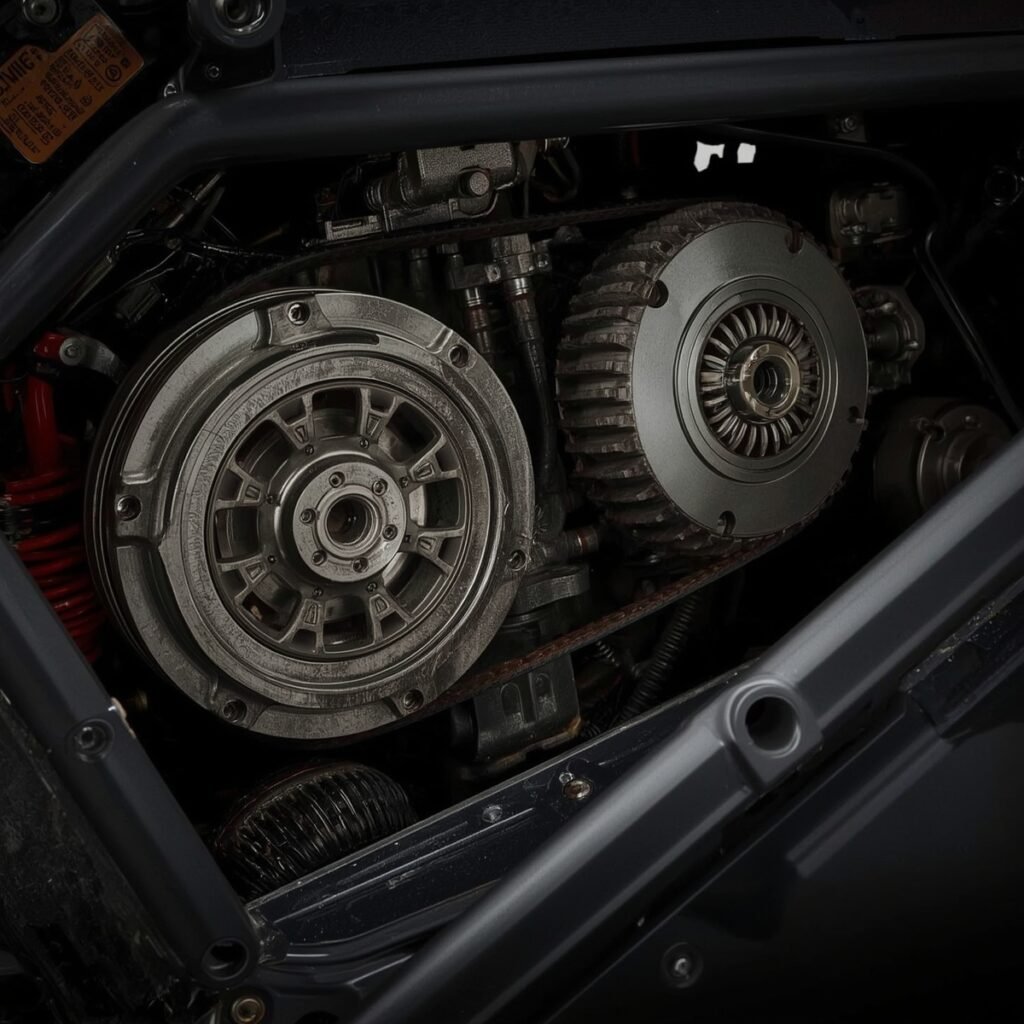
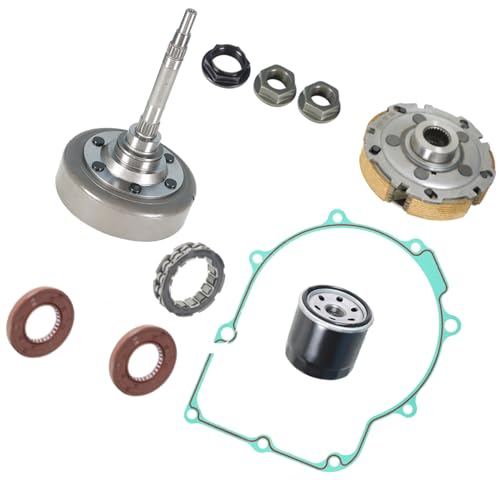
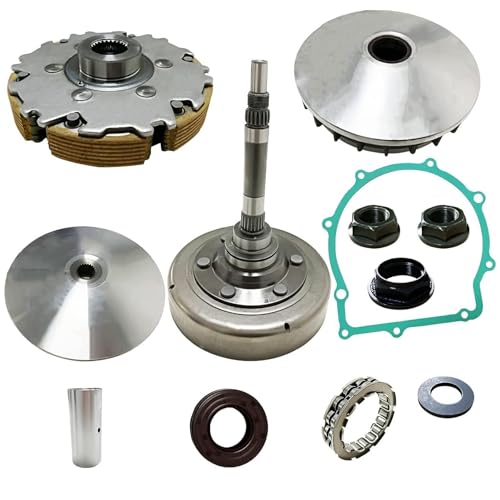
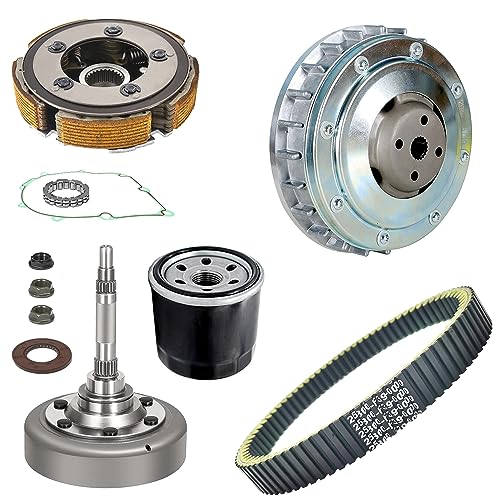
Most UTVs utilize a Continuously Variable Transmission (CVT) system, which consists of two main clutches: the primary (drive) clutch and the secondary (driven) clutch.
Aftermarket clutch kits typically involve modifying or replacing components within these two clutches.
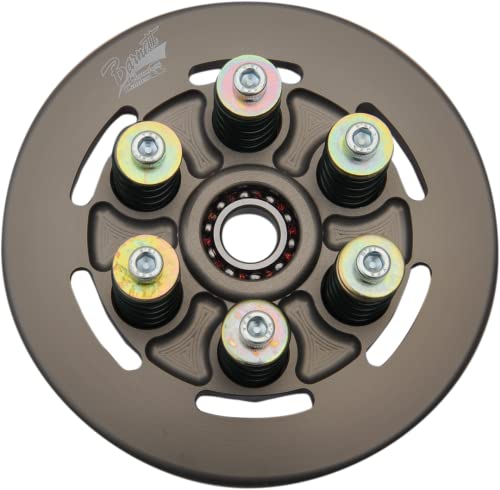
1. Spring and Weight Kits
This is the most common type of aftermarket clutch kit and often the most cost-effective.
These kits typically include:
- Primary Clutch Spring: Replaces the stock spring in the primary clutch. Different spring rates (stiffness) affect the engagement RPM (when the clutch starts to grab) and the shift-out RPM (when the clutch fully shifts).
- Primary Clutch Weights (or Arms/Flyweights): These are centrifugal weights that move outward as RPM increases, forcing the primary clutch sheaves together. Aftermarket weights often have different profiles or adjustable weights to alter the shift curve and backshifting characteristics. Heavier weights tend to lower engagement and shift-out RPMs, while lighter weights raise them [4].
- Secondary Clutch Spring: Replaces the stock spring in the secondary clutch. This spring controls how quickly the secondary clutch opens and closes, influencing backshifting and engine braking.
- Helix (for some models): The helix is a ramped component in the secondary clutch that the rollers ride on. Changing the helix angle can significantly alter the shift curve, affecting how the UTV shifts under load and how quickly it backshifts.
These kits are designed to optimize the CVT’s performance for specific applications, such as:
- Larger Tires: Compensate for the increased rotating mass and diameter of oversized tires.
- High Altitude: Adjust for the thinner air, which reduces engine power.
- Mud Riding: Provide more aggressive engagement and better belt grip in demanding conditions.
- Dune Riding: Optimize for sand-specific power delivery and flotation.
- Trail Riding: Offer a smoother, more responsive power delivery for varied terrain.
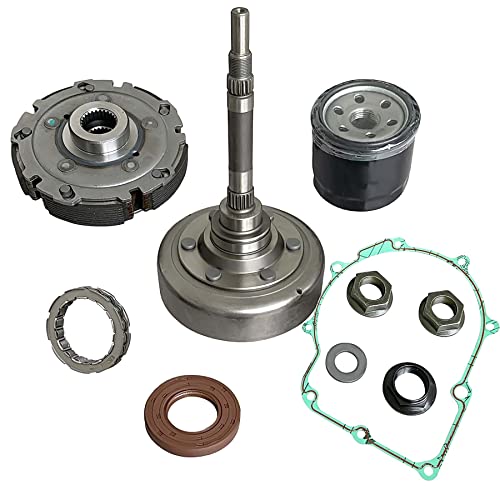
2. Complete Primary and/or Secondary Clutch Replacements
In some cases, especially for highly modified UTVs or those with known stock clutch weaknesses, a complete replacement of the primary and/or secondary clutch may be recommended.
These are often heavier-duty units designed for extreme abuse, higher horsepower applications, or to address specific design flaws in OEM clutches.
Brands like STM and Aftermarket Assassins offer complete clutch assemblies that are built for performance and durability [5].
3. Adjustable Clutch Kits
Many premium clutch kits offer a high degree of adjustability, allowing users to fine-tune their setup without purchasing entirely new components.
This is typically achieved through:
- Adjustable Weights: Weights that can be modified by adding or removing small screws or rivets, allowing for precise tuning of the shift curve.
- Multiple Spring Options: Kits that include a selection of primary and secondary springs with different rates, giving the user more flexibility.
- Interchangeable Helixes: Some secondary clutches allow for quick and easy helix changes to alter the shift characteristics.
Choosing the right type of clutch kit depends on your UTV model, your riding style, the terrain you frequent, and any modifications you’ve made (or plan to make) to your UTV.
It’s always recommended to consult with reputable clutch kit manufacturers or experienced tuners to ensure you select the kit that best suits your needs.
[4] “Adding horsepower normally means you need to add clutch weight, go steeper on the helix angle, or…” – Black Market UTV, CVT Tuning General Rules.
[5] “In this guide, we”ll dive deep into the best clutch options for CVT-equipped vehicles, including STM Primary Clutches, STM Secondary Clutches, and Aftermarket…” – DiGrig PowerSports, Best Clutch Kits for Polaris ATVs, UTVs, Side by Sides | STM & AA.

Step-by-Step UTV Clutch Kit Installation: A Detailed Guide
Disclaimer: While this guide provides a comprehensive overview of UTV clutch kit installation, it is intended for informational purposes only.
Working with UTV clutches involves specialized tools and knowledge.
If you are not comfortable performing this procedure, it is highly recommended to seek professional assistance.
Always refer to your UTV’s service manual and the specific instructions provided with your clutch kit.
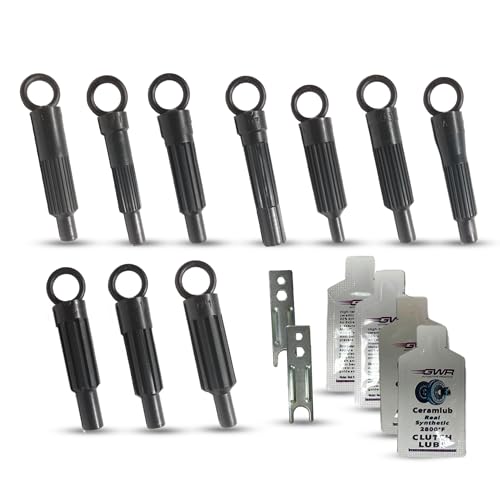
Tools and Materials You’ll Need:
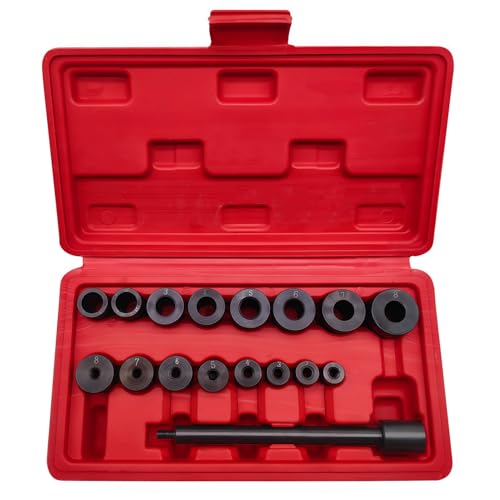
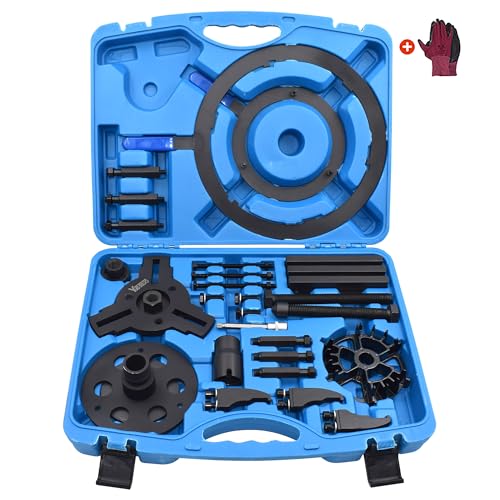
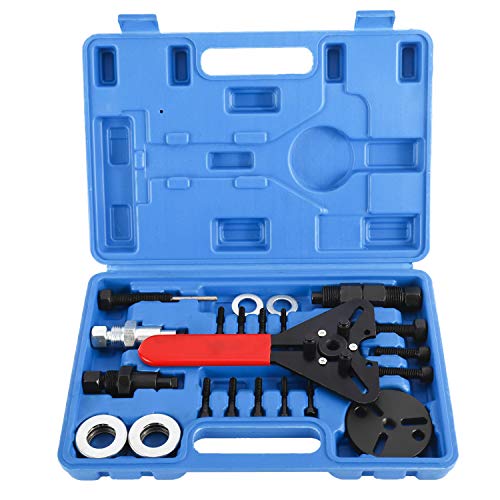
- Clutch Puller Tool: Essential for removing the primary clutch. This tool is specific to your UTV model.
- Clutch Compression Tool (or Spring Compressor): Needed to compress the primary and/or secondary clutch springs for component removal/installation.
- Impact Wrench (optional but highly recommended): For quick and easy removal of clutch bolts.
- Torque Wrench: Crucial for tightening bolts to the manufacturer’s specifications.
- Socket Set and Wrenches: Various sizes will be needed.
- Allen Wrenches/Hex Keys: For various fasteners.
- Snap Ring Pliers: For removing and installing snap rings.
- Belt Removal Tool (if applicable): Some UTVs have a specific tool for spreading the secondary clutch sheaves to remove the belt.
- Clean Rags and Brake Cleaner: For cleaning components.
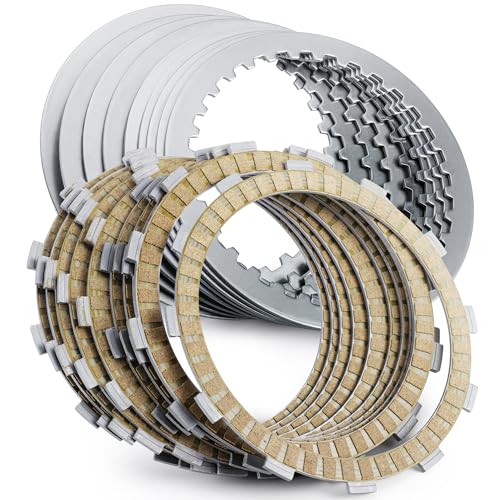
- New Clutch Kit Components: Springs, weights, helix, etc.
- New CVT Belt (recommended): It’s good practice to install a new belt with a new clutch kit.
- Gloves and Safety Glasses: Always prioritize safety.
Installation Steps:
1: Prepare Your UTV
- Park on a Level Surface: Ensure your UTV is on a stable, level surface. Engage the parking brake.
- Disconnect Battery: For safety, disconnect the negative terminal of your UTV’s battery to prevent accidental starting.
- Remove Clutch Cover: Locate and remove the CVT clutch cover. This usually involves several bolts around the perimeter. Be careful not to damage the gasket [6].
2: Remove the CVT Belt
- Loosen Secondary Clutch: If your UTV has a belt removal tool, insert it into the secondary clutch to spread the sheaves. If not, you may need to manually spread them while rotating the belt off.
- Remove Belt: Once the secondary clutch is spread, the belt will loosen. Carefully work the belt off both the primary and secondary clutches.
3: Remove the Primary Clutch
- Remove Primary Clutch Bolt: Use the appropriate socket and an impact wrench (or breaker bar) to remove the large bolt securing the primary clutch to the crankshaft. This bolt is often very tight.
- Install Clutch Puller: Thread the clutch puller tool into the primary clutch. Ensure it’s fully engaged.
- Pull the Clutch: Use a wrench or impact wrench to tighten the clutch puller. The primary clutch will eventually pop off the crankshaft. This may require significant force [7].
- Inspect Primary Clutch: Once removed, inspect the primary clutch for any signs of wear, damage, or excessive play in the bushings.
4: Disassemble and Install Primary Clutch Kit Components
- Compress Primary Clutch: Use a clutch compression tool to compress the primary clutch spring. This will allow you to access the internal components.
- Remove Snap Ring/Nut: Carefully remove the snap ring or nut that retains the spring and internal components.
- Remove Components: Decompress the tool slowly and remove the spring, washers, and any other components. Note their orientation.
- Replace Weights and Spring: Install the new weights (flyweights) and spring from your clutch kit. Ensure the weights are installed correctly on their pins. If your kit includes new rollers or bushings, replace those as well.
- Reassemble Primary Clutch: Compress the clutch again, install the retaining snap ring/nut, and slowly decompress the tool. Double-check that all components are seated correctly.
5: Disassemble and Install Secondary Clutch Kit Components (if applicable)
- Remove Secondary Clutch Bolt: Remove the bolt securing the secondary clutch to the transmission input shaft.
- Remove Secondary Clutch: Carefully slide the secondary clutch off the shaft.
- Compress Secondary Clutch: Use a clutch compression tool to compress the secondary clutch spring.
- Remove Snap Ring/Nut: Remove the snap ring or nut retaining the spring and helix.
- Replace Spring and Helix: Decompress the tool and replace the spring and/or helix with the new components from your kit. Pay close attention to the orientation of the helix and spring.
- Reassemble Secondary Clutch: Compress the clutch, install the retaining snap ring/nut, and slowly decompress the tool.
6: Reinstall Clutches and Belt
- Reinstall Secondary Clutch: Slide the secondary clutch back onto the transmission input shaft and secure it with its bolt. Torque to manufacturer specifications.
- Reinstall Primary Clutch: Carefully slide the primary clutch back onto the crankshaft. Ensure it seats fully. Install the primary clutch bolt and torque it to the manufacturer’s specifications. Proper torque is critical here to prevent damage.
- Install New CVT Belt: Route the new CVT belt around the primary and secondary clutches. Use the belt removal tool (or manually spread the secondary sheaves) to get the belt fully seated. Ensure the belt is oriented correctly if it has a directional arrow.
7: Final Checks
- Rotate Clutches: Manually rotate the clutches to ensure the belt is properly seated and everything moves freely.
- Reinstall Clutch Cover: Reinstall the clutch cover, ensuring the gasket is properly seated. Torque the bolts to specification.
- Reconnect Battery: Reconnect the negative terminal of your UTV’s battery.
8: Test Ride
Take your UTV for a test ride in a safe, open area. Pay attention to engagement, acceleration, backshifting, and overall feel.
It may take a few miles for the new belt and clutch components to break in.
If you notice any unusual noises, vibrations, or performance issues, stop immediately and re-check your installation.
Important Note on Torque Specifications:
Always use a torque wrench and refer to your UTV’s service manual for precise torque specifications for all bolts.
Overtightening or undertightening can lead to serious damage or failure.
This UTV clutch kit installation process, while detailed, requires patience and attention to detail.
Taking your time and following each step carefully will ensure a successful upgrade and a significantly improved riding experience.
[6] “Remove 8 clutch cover bolts with 10mm socket. Use a ¼” drive screwdriver handle with 10mm socket to reach them.” – Polaris RZR Forum, 900XP clutch kit installation instructions.
[7] “Pull your belt off, then pull your secondary off. Get some tools for removing the primary. We have our clutch removal tool that screws in there.” – SuperATV, How to Install a Polaris UTV Clutch Kit.

Conclusion: Unleash Your UTV’s True Potential
Installing an aftermarket UTV clutch kit is one of the most impactful upgrades you can make to your off-road machine.
It’s not just about raw horsepower; it’s about optimizing how that power is deliverers to the ground, enhancing every aspect of your UTV’s performance.
From snappier acceleration and improved responsiveness to better power management and extended belt life, a properly tuned clutch kit transforms your riding experience, making it smoother, more efficient, and ultimately, more exhilarating.
While the installation process requires attention to detail and the right tools, the rewards are well worth the effort.
By understanding the benefits, choosing the right kit for your needs, and following a meticulous installation guide, you can unlock your UTV’s full potential and conquer any terrain with newfound confidence.
So, if you’re looking to take your off-road adventures to the next level, consider a clutch kit upgrade – it’s a decision your UTV (and your riding buddies) will thank you for!
What’s your experience with UTV clutch kits? Share your installation tips or performance gains in the comments below!