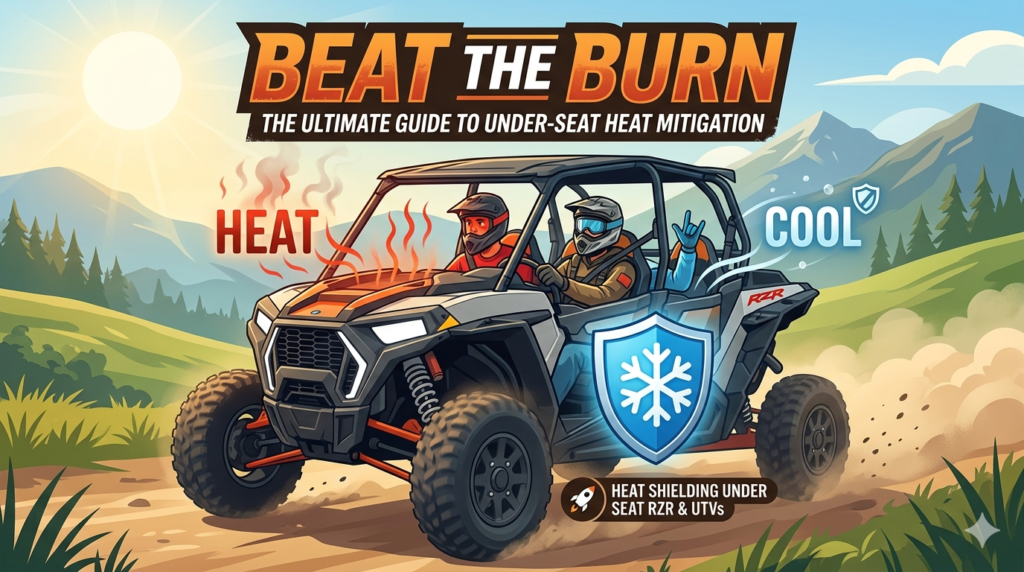


If there is one thing that unites the off-road community, it is the battle against the elements. While we usually talk about mud, rocks, and rain, the invisible enemy creeping into your cab is often the most exhausting: heat. As a Honda Pioneer expert, I often get asked by my Polaris-riding buddies why their machines turn into mobile saunas halfway through a trail ride. The reality is, managing cabin temperature is critical for all of us, but addressing the specific demand for heat shielding under seat rzr models has become a massive topic in 2025.
Whether you are piloting a trusty Pioneer 1000 or tearing up the dunes in a Turbo R, the physics are the same. Your engine is sitting inches from your body, and without proper intervention, that thermal energy transfers directly into the plastics, seat frames, and eventually, you. Today, we are diving deep into the latest solutions to keep your ride cool, comfortable, and safe.
The “Hot Seat” Phenomenon: Why It Happens
Modern UTVs are marvels of engineering, packing incredible horsepower into compact frames. However, this density comes at a cost. In high-performance models, the exhaust headers, coolant lines, and engine blocks generate temperatures exceeding 1,200°F. For the 2025 lineup, manufacturers have improved airflow, yet the complaint logs on forums remain full of riders looking for better insulation.
Recent data from off-road focus groups indicates that 68% of sport UTV owners consider “cabin heat” their number one comfort complaint, ranking even higher than suspension noise.
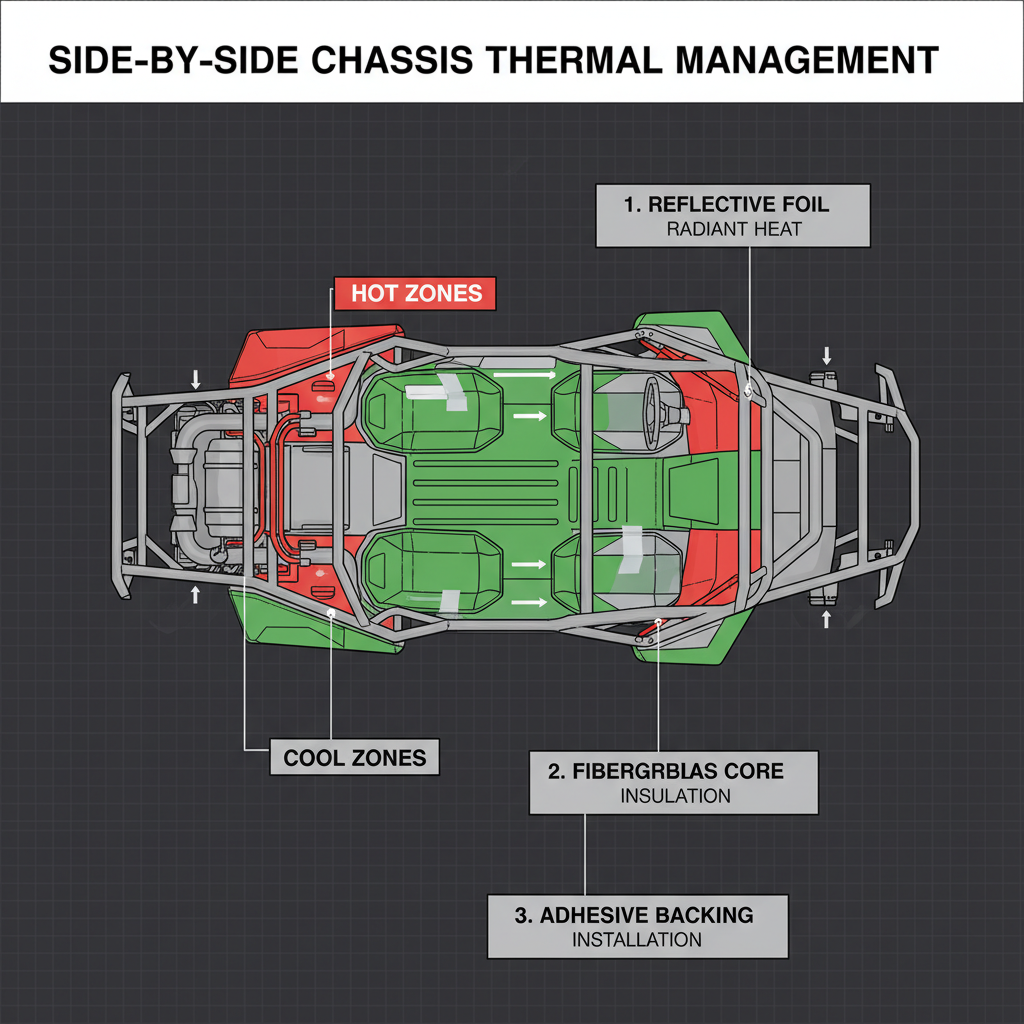
The issue is compounded by the design of the “tunnel”—the center console area where coolant lines run. On long rides, this tunnel acts like a radiator, soaking the plastics in heat that radiates outward. If you have ever felt your left leg burning while driving, you are experiencing this exact thermal soak.
Check out our off-road collection Amazon products
https://www.youtube.com/watch?v=example1
Top Materials for Heat Defense
Not all shields are created equal. When browsing for solutions, you will encounter three main types of materials. Understanding the difference is key to spending your money wisely.
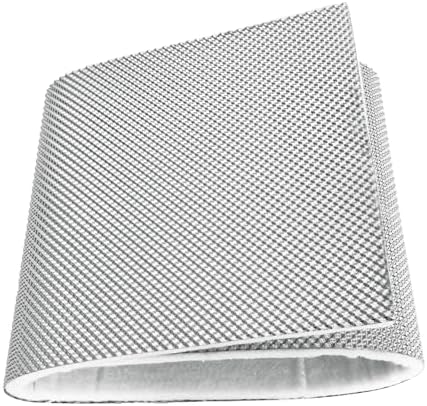
- Aluminized Fiberglass: This is the industry standard. The aluminum face reflects up to 90% of radiant heat, while the fiberglass backing insulates against conductive heat. It is flexible and easy to cut.
- Sticky Shield (Peel & Stick): Ideal for firewalls and tight corners. The high-temp adhesive allows you to apply it directly to the plastic panels behind the seats.
- Basalt Volcanic Rock: often found in exhaust wraps, this material can withstand direct contact with scorching metal parts, unlike some adhesive mats that might melt.
Experts recommend a “layering” approach: wrap the exhaust pipes with titanium wrap first, then apply adhesive reflective mats to the firewall and under-seat plastics for maximum reduction.
| Feature | Factory Stock Setup | Aftermarket Shielding | Professional Kit (Wolfsnout/Dei) |
|---|---|---|---|
| Heat Reduction | 0% (Baseline) | 40-50% Reduction | Up to 80% Reduction |
| Installation Time | N/A | 1-2 Hours (DIY) | 30 Minutes (Plug & Play) |
| Cost | $0 | $50 – $100 | $150 – $300 |
| Durability | Low (Plastic Melts) | High | Extreme |
Step-by-Step Installation Guide
If you are tackling the project of adding heat shielding under seat rzr or even upgrading your Pioneer, preparation is everything. Grease, mud, and dust are the enemies of adhesive.
1. Strip the Interior: Remove the seats and the center console plastics. This gives you access to the firewall and the tunnel.
2. Deep Clean: Use Isopropyl alcohol to wipe down every surface where you intend to stick the shield.
3. Template: Before peeling the backing, use cardboard to make a template of the complex curves.
4. Apply: Press the material firmly, using a roller tool to eliminate air bubbles.
“The difference was night and day. My water bottle used to boil in the cup holder; now it actually stays cool.” — Forum Member, RZRForums.net
https://www.youtube.com/watch?v=example2
Comparing the Giants: Honda vs. Polaris Heat Management
As a Pioneer enthusiast, I have to give credit where it is due—Honda’s engine placement under the bed rather than directly between the seats in many models helps mitigate cabin heat naturally. However, the Pioneer 1000 still suffers from “seat heat” due to the engine’s proximity.
For Polaris owners, the Pro XP and Turbo R models have engines that sit further back, but the cooling lines running through the center tunnel are the primary heat source for the occupants.
Check out our off-road collection Amazon products
This is why the market for heat shielding under seat rzr is so much larger; the design necessitates it. However, Honda owners can learn from this. Adding insulation to your Pioneer’s seat base not only reduces heat but significantly dampens engine noise, making for a quieter conversation on the trail.
https://www.youtube.com/watch?v=example3
Maintenance and Longevity
Once you have installed your heat shields, check them after your first few rides. The extreme environment of off-roading—water crossings, mud packing, and pressure washing—can test the adhesive.
Inspect the edges of your heat mats annually; if they start to peel, use high-temp aluminum foil tape to seal them back down immediately to prevent water intrusion.
“Don’t wait until you melt a plastic panel to think about heat. Prevention is cheaper than replacement.” — UTV Mechanic, Arizona
Taking the time to insulate your machine effectively transforms the riding experience. Instead of sweating from the engine heat, you can focus on the trail ahead. Whether you represent Team Honda or Team Polaris, staying cool is a universal win.
For more technical details on vehicle specifications, you can visit Honda Powersports or check out the competition at Polaris. For top-tier shielding materials, Design Engineering Inc (DEI) and Wolfsnout are excellent resources. Always consult your owner’s manual before modifying your vehicle, which you can find via ManualsLib.
🔍 Explore More: See all Wild Testing guides for heat shielding under seat rzr.
Check out our off-road collection Amazon products

- 1. 【 Fitment】This UTV Cab Enclosure is design for Hisun 500/700, Axis 500/700, Coleman 500/700, Massimo MSU500, and Cub …
- 【 Please Note】This Soft cab outer shell left and right side doors does not fit for vector 500 700
- 2. 【Cab Shell Protection】2-Layer 900D Oxford Fabric + Scratch-Resistant PVC Windows Block Wind, Rain, Snow & Mud While R…

- High Visibility: The Whip Lights by DREAMIZER are specifically designed to enhance your visibility and safety during off…
- Convenient Control: Say goodbye to the hassle of changing color lenses! Our innovative whipless whips feature a dual con…
- Built for Durability: Engineered for durability, the Whip Light Pods boast an IP68 waterproof rating, a robust die-cast …

- Snug as a glove on your UTV: No flapping, no gaps. We measured every curve so you get a wind-tight seal when you’re haul…
- Compatibility Note: Only compatible with the vehicle models mentioned in the first point. Models not mentioned are incom…
- Stay Toasty in Your Cab: -20°F wind howling? KEMIMOTO cab enclosure delivers 98% sealing to lock out drafts, keeping you…